Pay Pages
The Nuvei Hosted Pages can be heavily styles and are device aware, responsive and reactive, depending on the amount of effort the Merchant wants to put in to styling them. You can locate “Pay Pages” under the SETTINGS tab in the SelfCare .
Select Pay Pages from the drop down box to view the hosted payment page layout template options. The payment page template can also be designed to process payments over the phone or by mail order for your smartphone, or tablet by checking the Mobile or Tablet boxes under “Use for MOTO”.
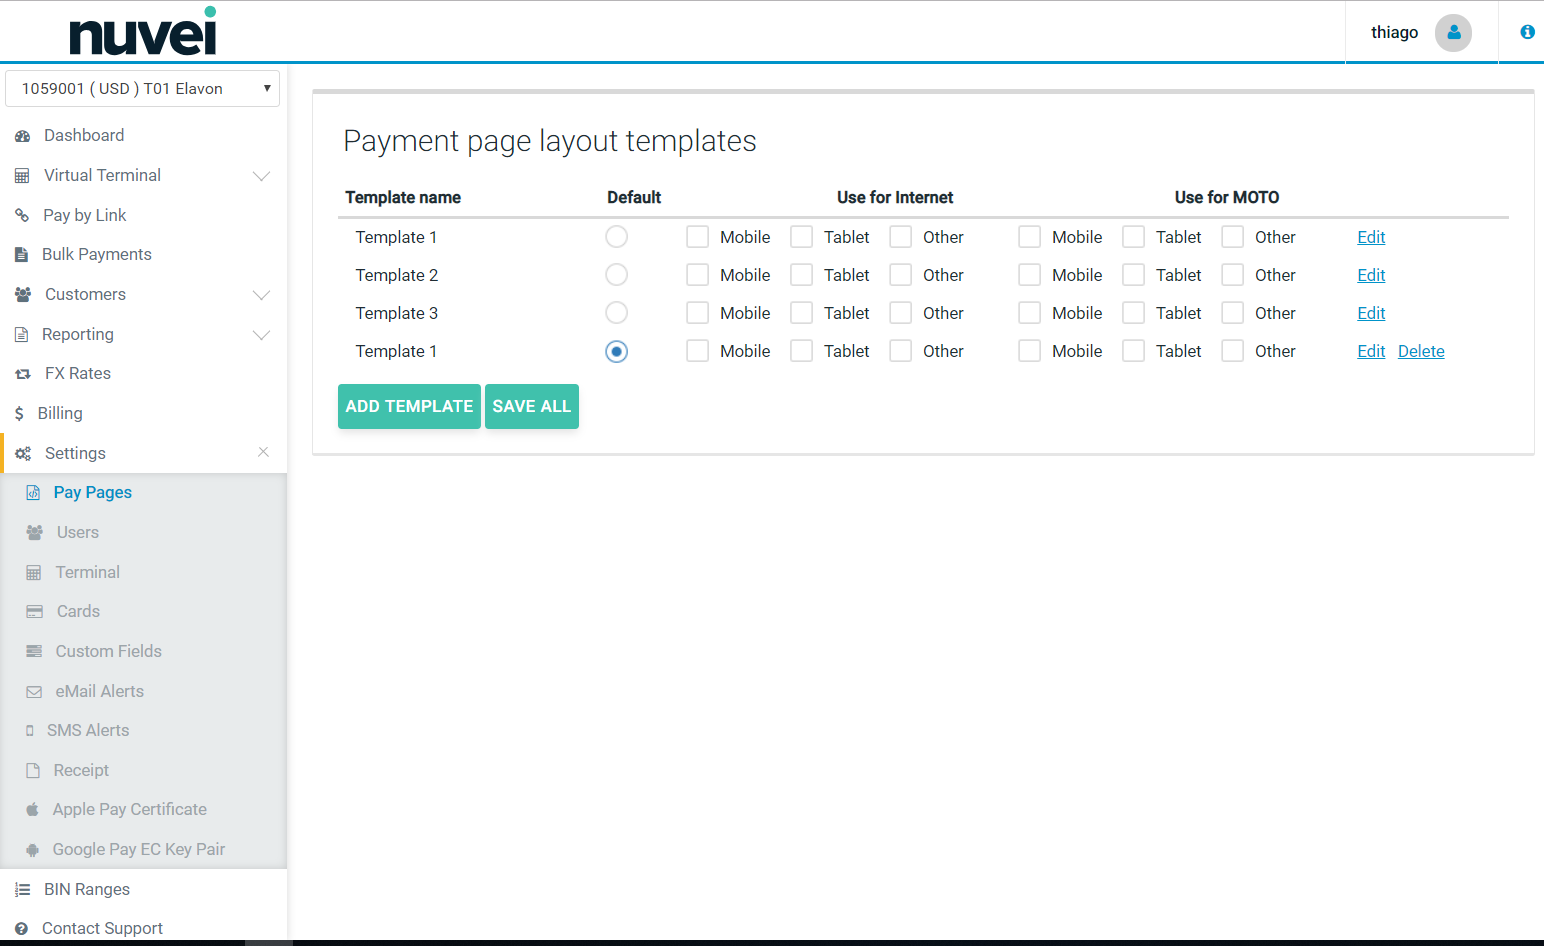
As you can see from the image above it is simple to configure separate templates to be used for various devices. This is intended as a shortcut; a simple way of “cheating” the customer to think it's a responsive webpage, however a single template can be made totally responsive if desired.
As you can see different template can also be used for Mail Order (TEL) and eCommerce transactions (WEB).
There are three permanent templates and they default to some sample styles. They do not all have to be used.
The Hosted Pages can have images included on them, but these image files must be hosted on the merchants website. This way, the URL image can be used in the Payment Page styling.
In the screen above, if you click on Add Template or select Edit for one of the templates listed, you will arrive at the template real-time editor. Note that the Style Editor provides the ability to scroll through many different parameter settings for your payment screen. On the right side of your screen is a real time preview of the payment screen as it would appear with the current parameter selections if the auto update box is checked. The payment page parameters may be individually selected for a Hosted Payment Page, Secure Token and Subscription screens.
Only users who have “Pay Pages” permissions will have access to this interface. It can be found once logged in by clicking “Settings” and then “Pay Pages” in the menu.
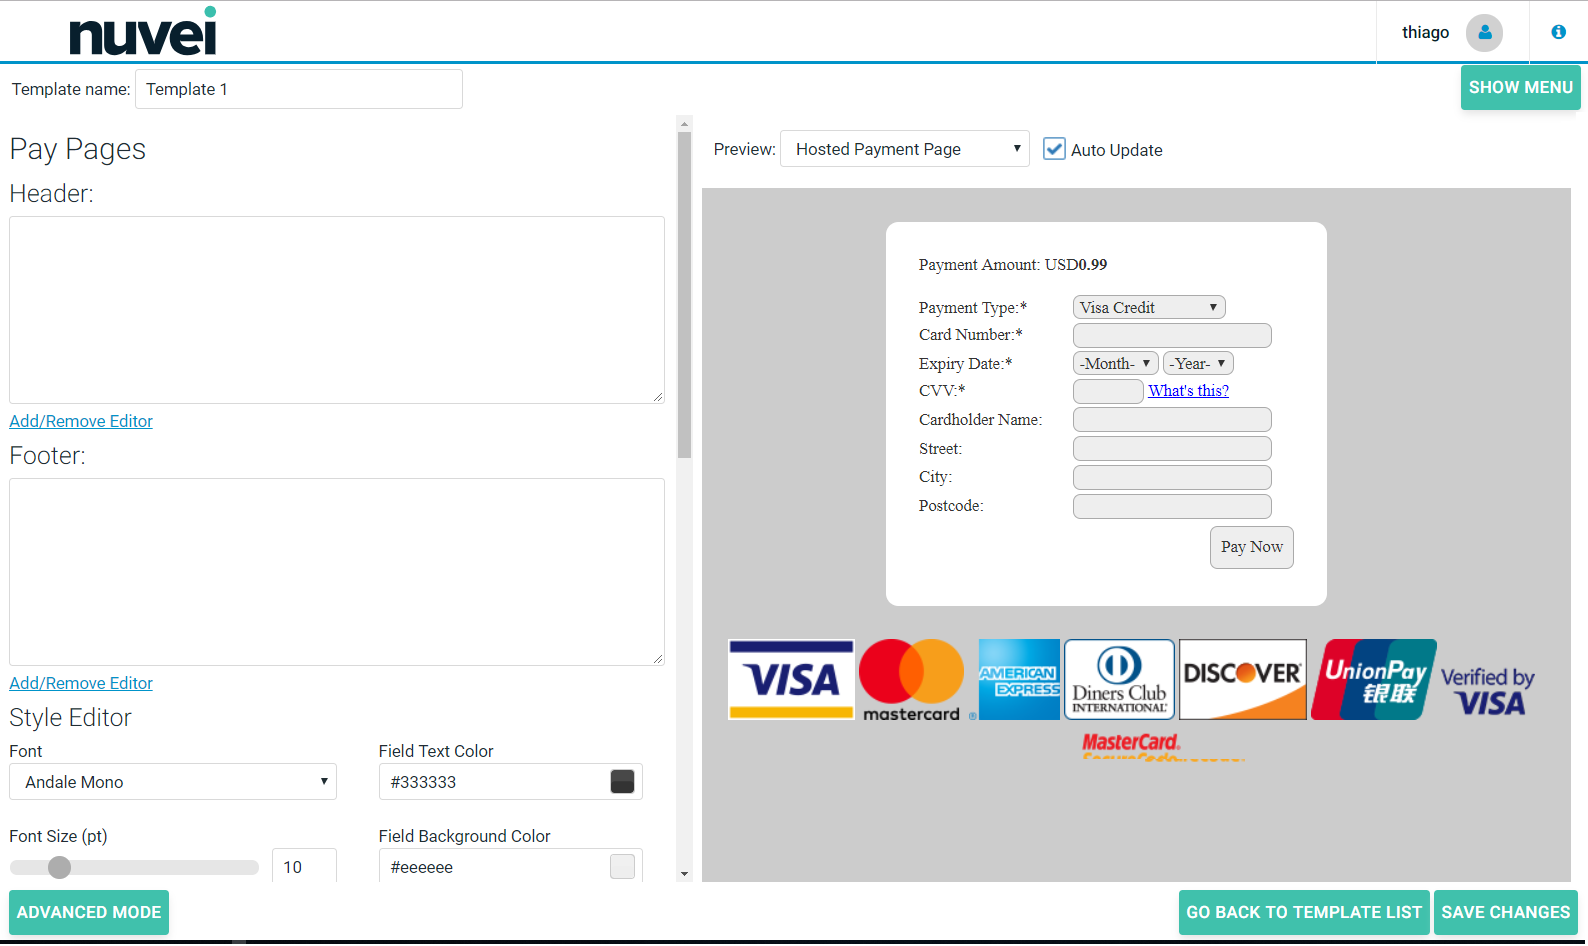
Basic template styling requires no knowledge of HTML or CSS. It can allow a merchant to style the page to an acceptable level. Previews of all hosted pages can be viewed on the right hand side.
All new templates created are basic. It's best to style as close as possible to what you are looking for in this mode before clicking “Advanced Mode” for more options.
Also, notice that switching from the Basic Editor to Advanced Mode is a one-way only change. After doing it, you will not be able to switch back to basic editor to edit this template. A warning box will appear if this option is chosen which will ask if you want to continue or cancel. If you choosing this option results in error, select Cancel to go back to the Basic Editor.
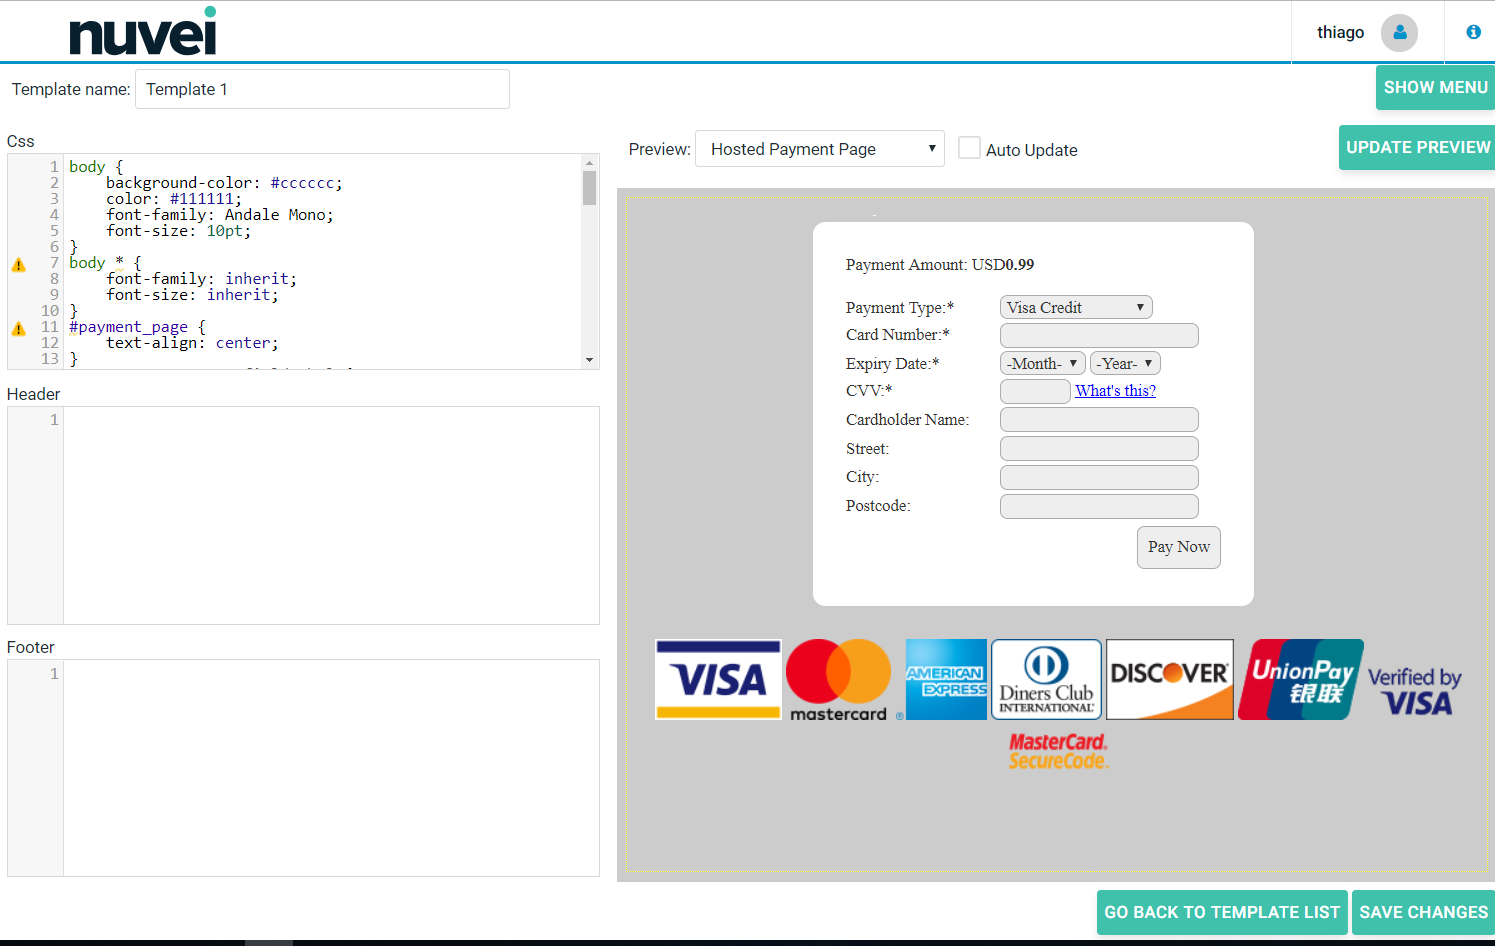
Advanced mode allows you to directly edit the CSS of the page and also the HTML of the Header and Footer. It is recommended not to use Auto Update in this mode. The @import CSS tag is blocked for HPP customization.
Because of the custom CSS that cannot be reverted to the same constraints as the Basic Mode, once you have entered Advanced mode you cannot go back to Basic Mode styling.
Scroll down to see all the options offered by the Style Editor and to review each change as it appears on the Preview screen.
When finished with your parameter selections, select Save Changes or Return to Template List.
Using Level 3 Enhanced Data
If you are using enhanced data, more specificaly, Level 3 enhanced data, your transactions might have items. If you want them to be visible for your customer, you should mark Display Enhanced Data or manually add the following piece of style to your template.
a#enhancedDataLink {
    color: #0000ff;
    text-decoration: none;
}
#enhancedData {
    display: none;
}
#enhancedData h4 {
    font-size: 1.2em;
    border-bottom: 1px solid #eeeeee;
    padding-bottom: 0.6em;
    margin-bottom: 0.6em;
}
#enhancedData ul {
    padding: 0;
    list-style: none;
    border-bottom: 1px solid #eee;
    padding: 0 0.6em 0.6em;
    margin-bottom: 0.6em;
}
#enhancedData .total,
#enhancedData .summary {
    border: 1px solid #ccc;
    background: none;
    border-radius: 5px;
    padding: 0.6em;
}
#enhancedData li {
    display: table;
    width: 100%;
    padding: 0.2em 0 0.4em;
}
#enhancedData li span {
    display: table-cell;
}
#enhancedData .label {
    padding-right: 1em;
    min-width: 100px;
}
#enhancedData .info {
    text-align: right;
}
.bold {
    font-weight: bold;
}