Reporting
Table of Contents
Open Batch
The Open Batch report provides Merchants with the ability to:
- I) View the transactions processed and still not settled for a terminal, or all terminals.
- II) Export transactions at open batch to a CSV file.
- III) Mark transactions as “Pending”.
- This will prevent them from being settled until set to “Ready”.
- Transactions cannot be altered from “Ready” to “Pending” after the terminal batch time.
- IV) “Void” transactions before they are settled.
- This will cause them to not be settled and moved to the closed batch at the settlement time.
- A transaction cannot be voided after the terminal batch time.
- V) Mark transactions as “Ready”, instructing Nuvei to settle this transaction.
- VI) View net totals.
- VII) Search transactions in the open batc
- h - by transaction info, card details, custom fields or other options.
- VIII) View transaction details.
- IX) Search for transactions.
- X) Resend the cardholder receipt copies.
- XI) Refund transactions not settled yet.
- XII) Print merchant or cardholder receipts copies.
The page size is set to 20 transactions. If the transactions found cannot fit on one page, the list will be apread between several pages and a page navigator will appear above the transactions' list.
In order to mark some transactions as “Pending”, “Void” or “Ready”, you should tick the desired transactions and then click on the relevant button (“Pending”, “Void” or “Ready”).
Only “Ready” transactions will be settled during the next settlement process. “Declined”, “Referral” and “Void” transaction types will all be moved to the “Closed Batch” section during the settlement process.
Please note that “Net Total” is the sum of the ready transactions displayed on the current page only - this value is not calculated for all the transactions related to the terminal.
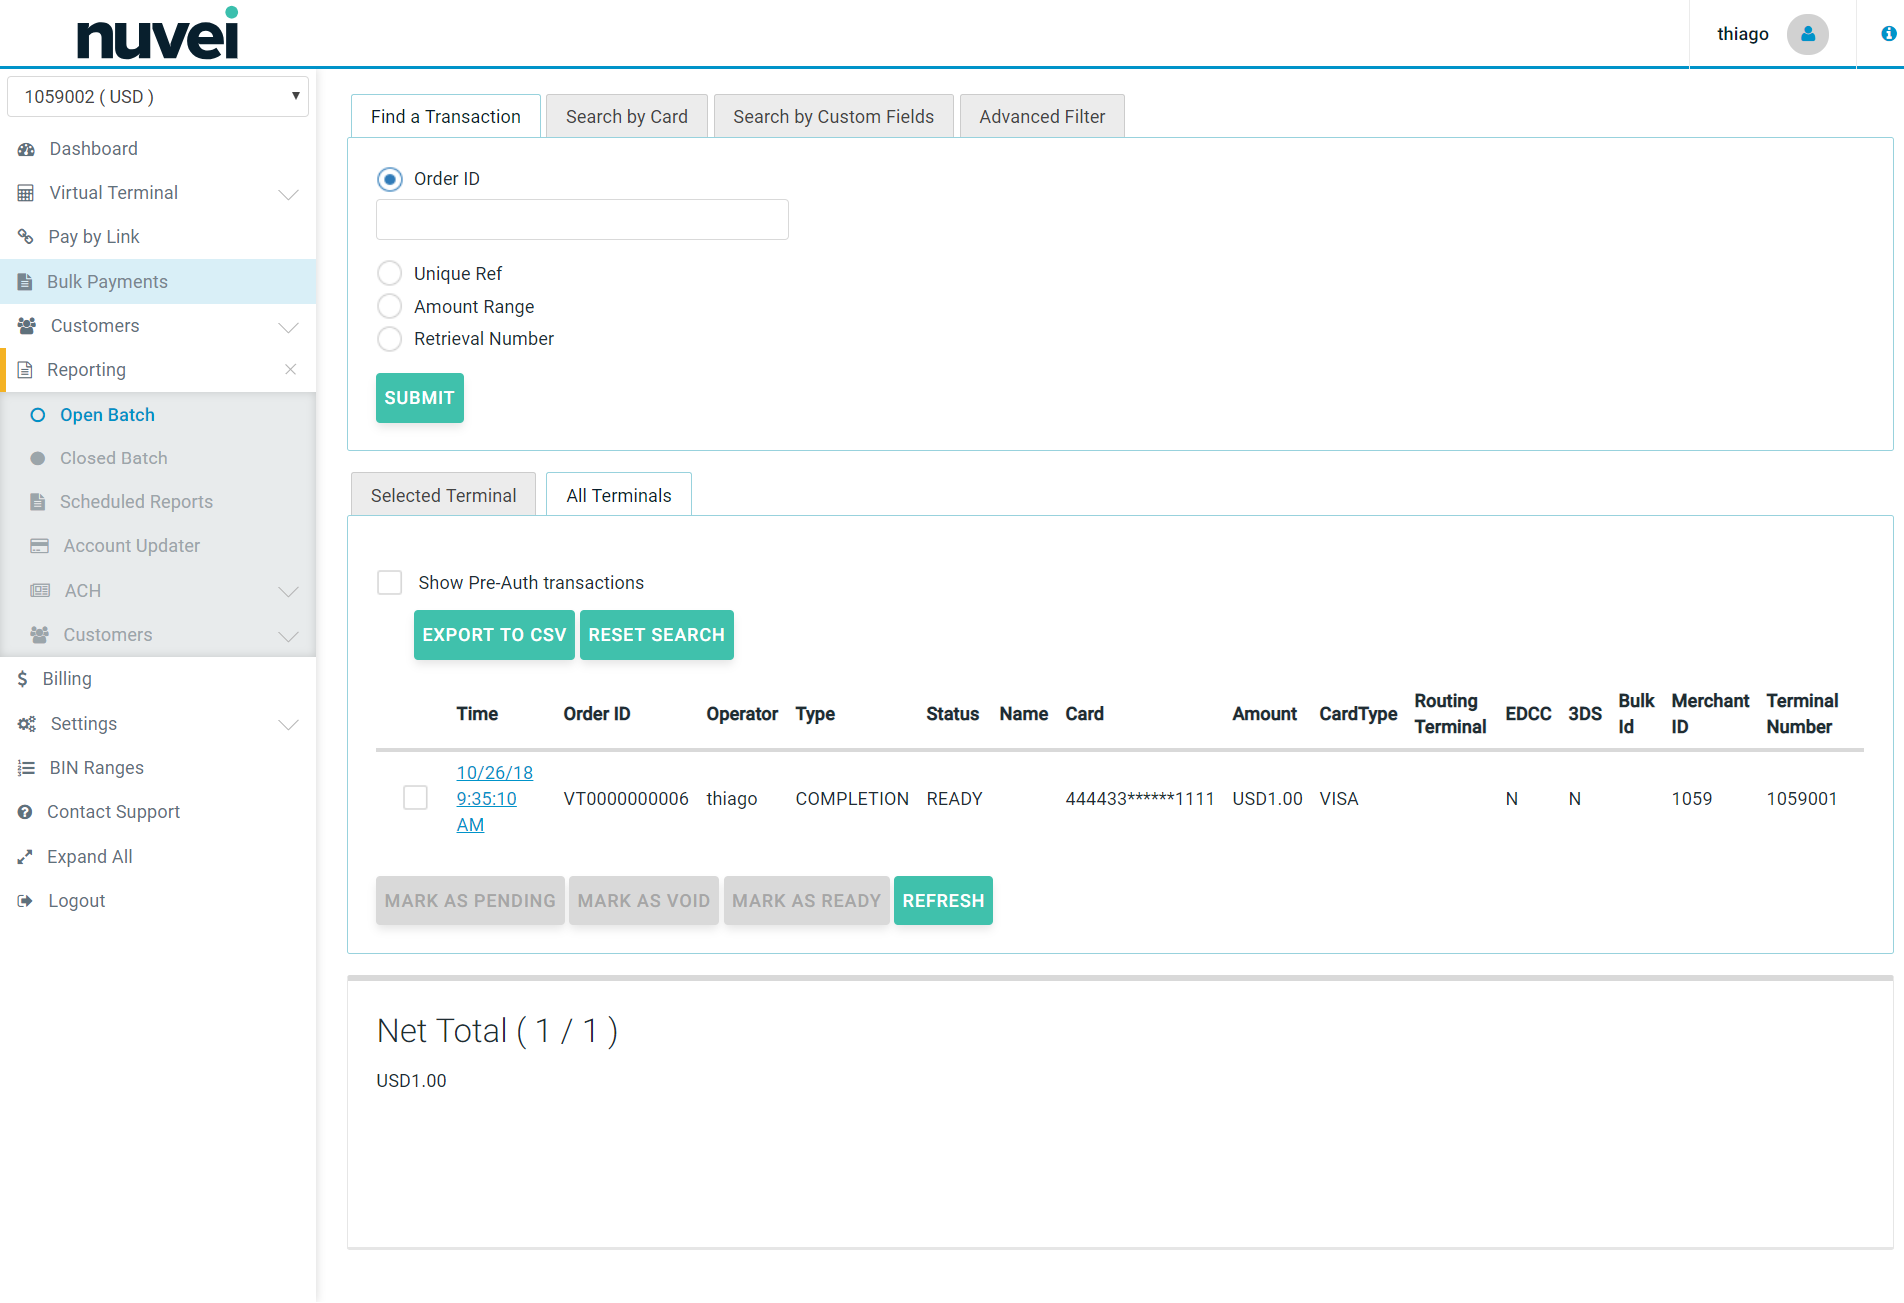
You can access the Open Batch by clicking on the “Reporting” tab:

You can search for open (i.e. unsettled) transactions in the “Find a Transaction” tab by: Order ID (it's a unique transaction number given by the merchant; i.e. order reference number), unique reference (it's a unique transaction number attributed automatically to each transaction by Nuvei system) or by amount range (the range of the transaction value).
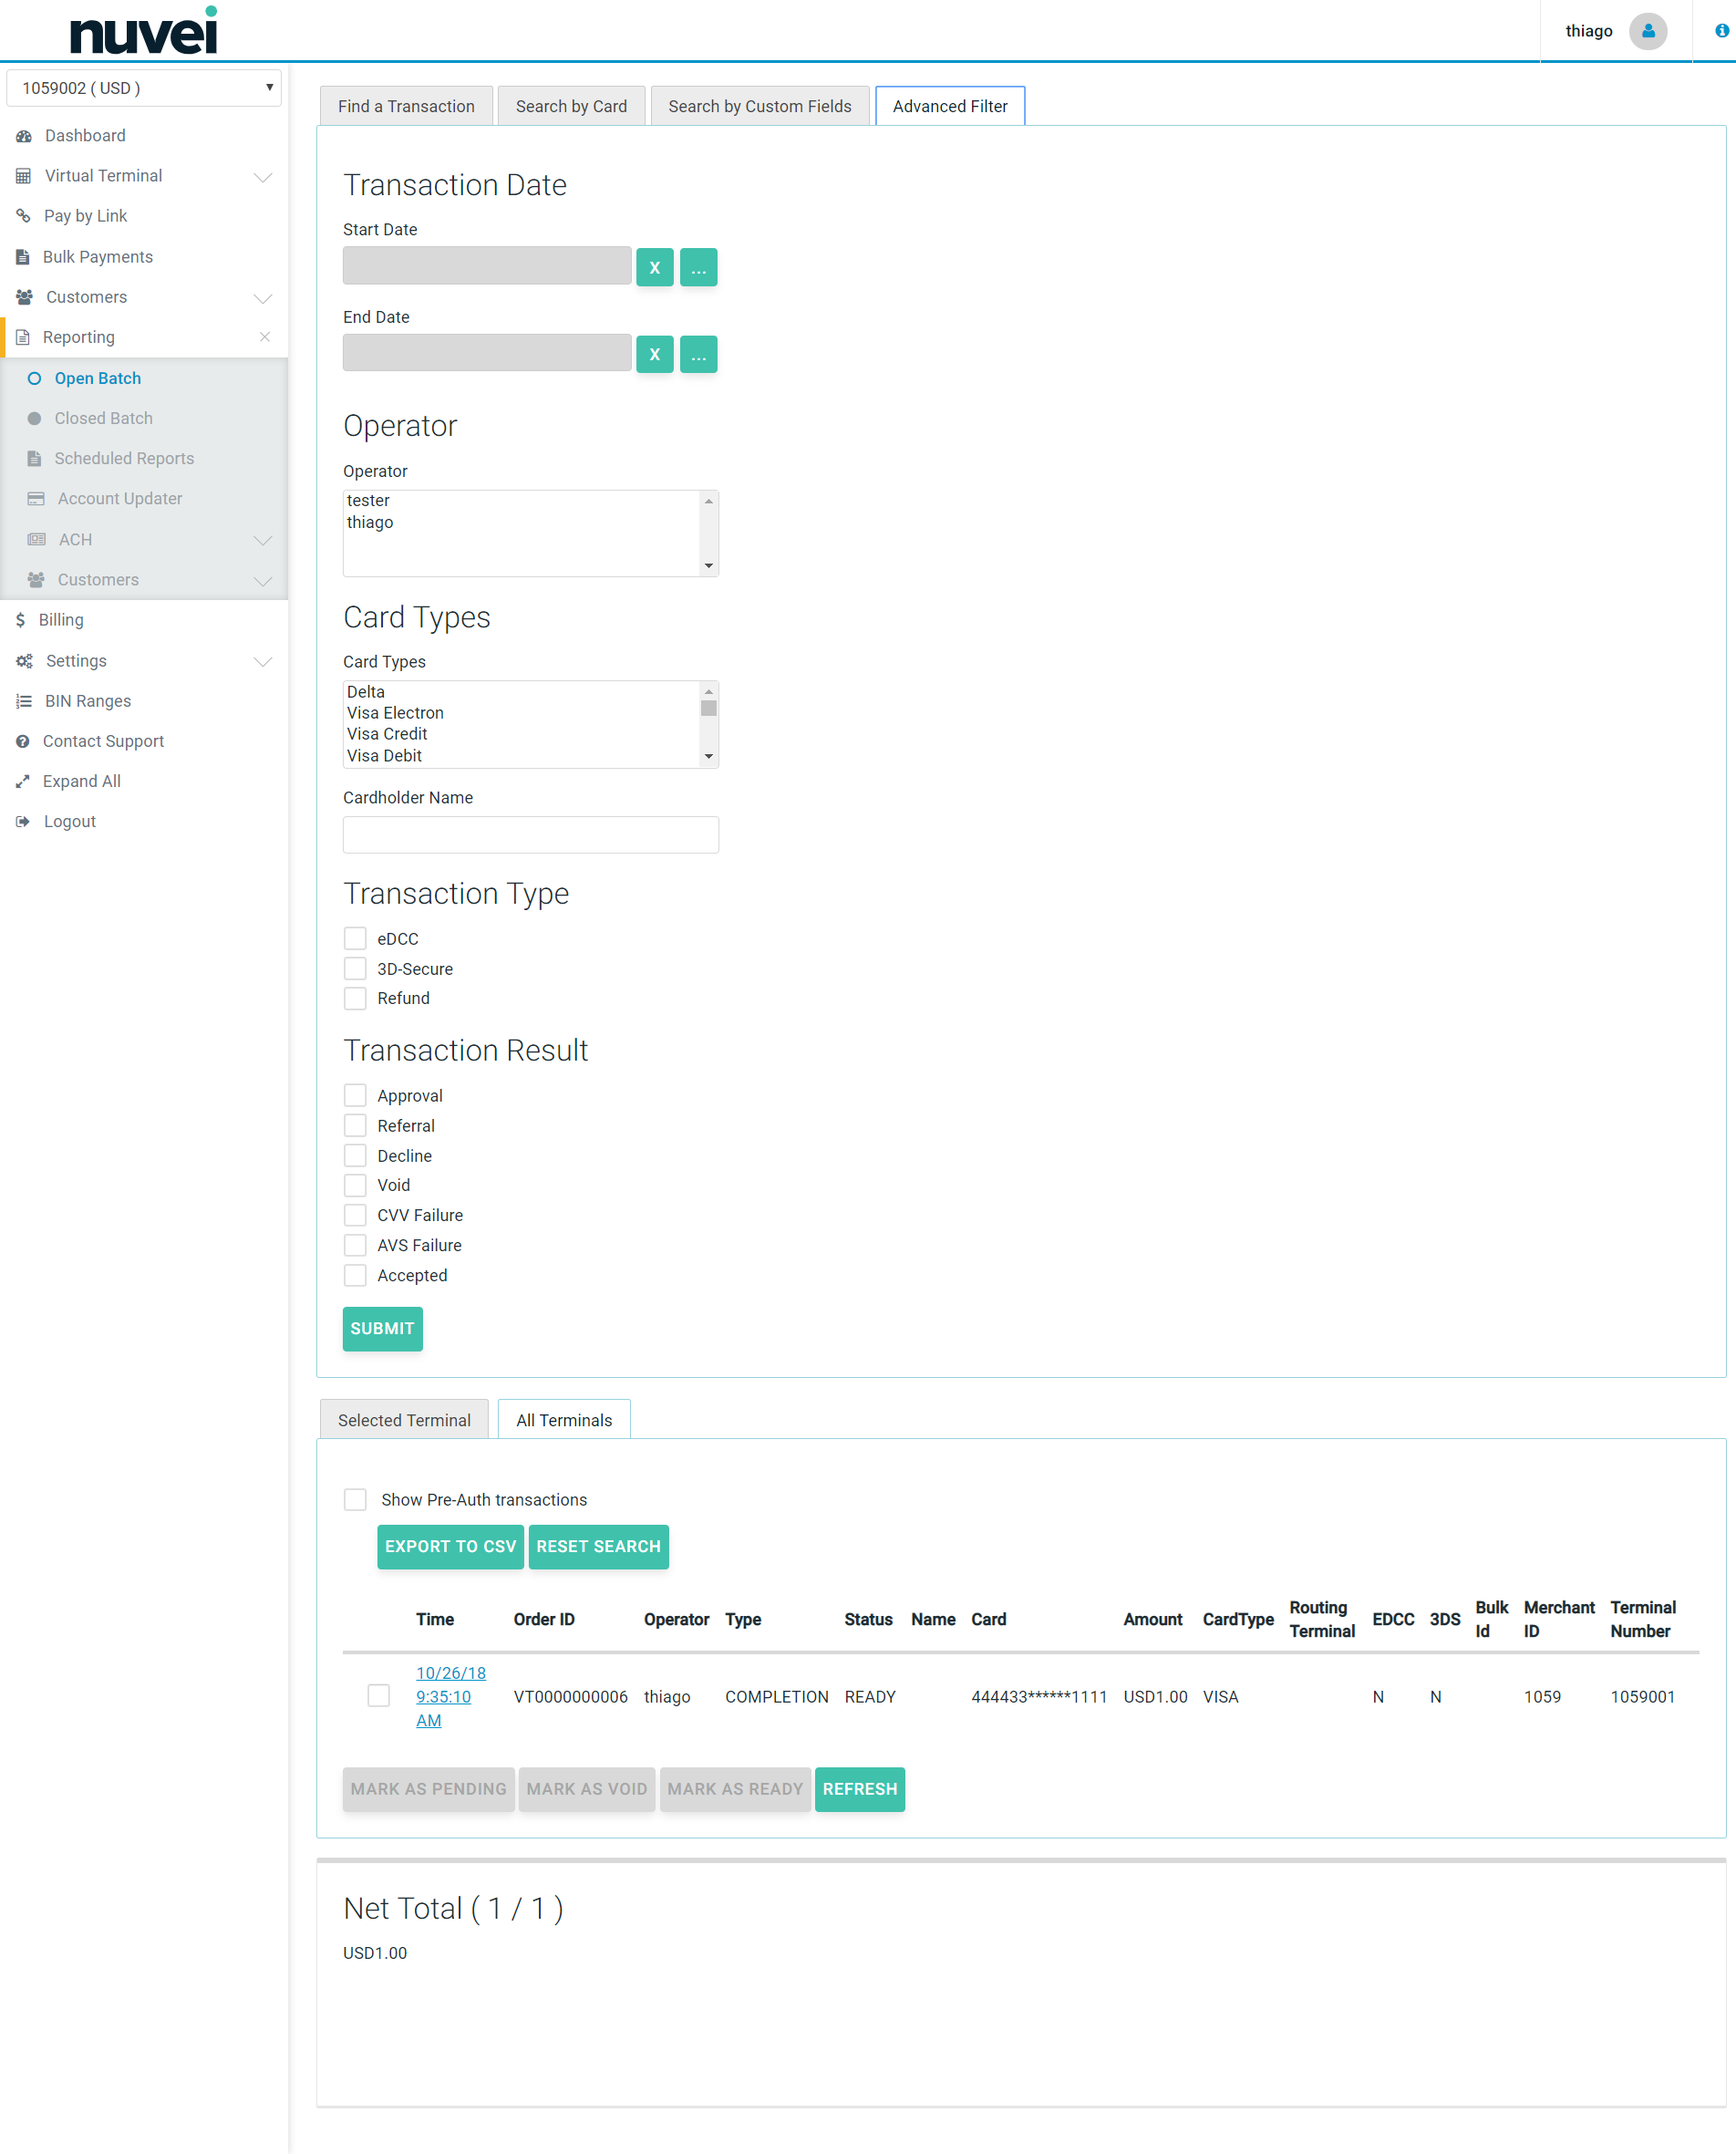
You can also click on the “Advanced Filter” tab, where you will be able to broaden the search criteria by: Transaction Date, Operator, Card Types and Transaction Result (e.g approval, referral, decline, void).
The transaction details include: the settlement time and date, Order ID, Operator (this is the name of the person who processed the credit card details. It can also be be an automatic payment), type of transaction, status (ready, void or refund) name of the cardholder, incomplete card number, amount, card type, and information if an electronic dynamic currency conversion feature was used.
Please see the screenshots below:
Clicking on the transaction time and date field will display standard transaction details.
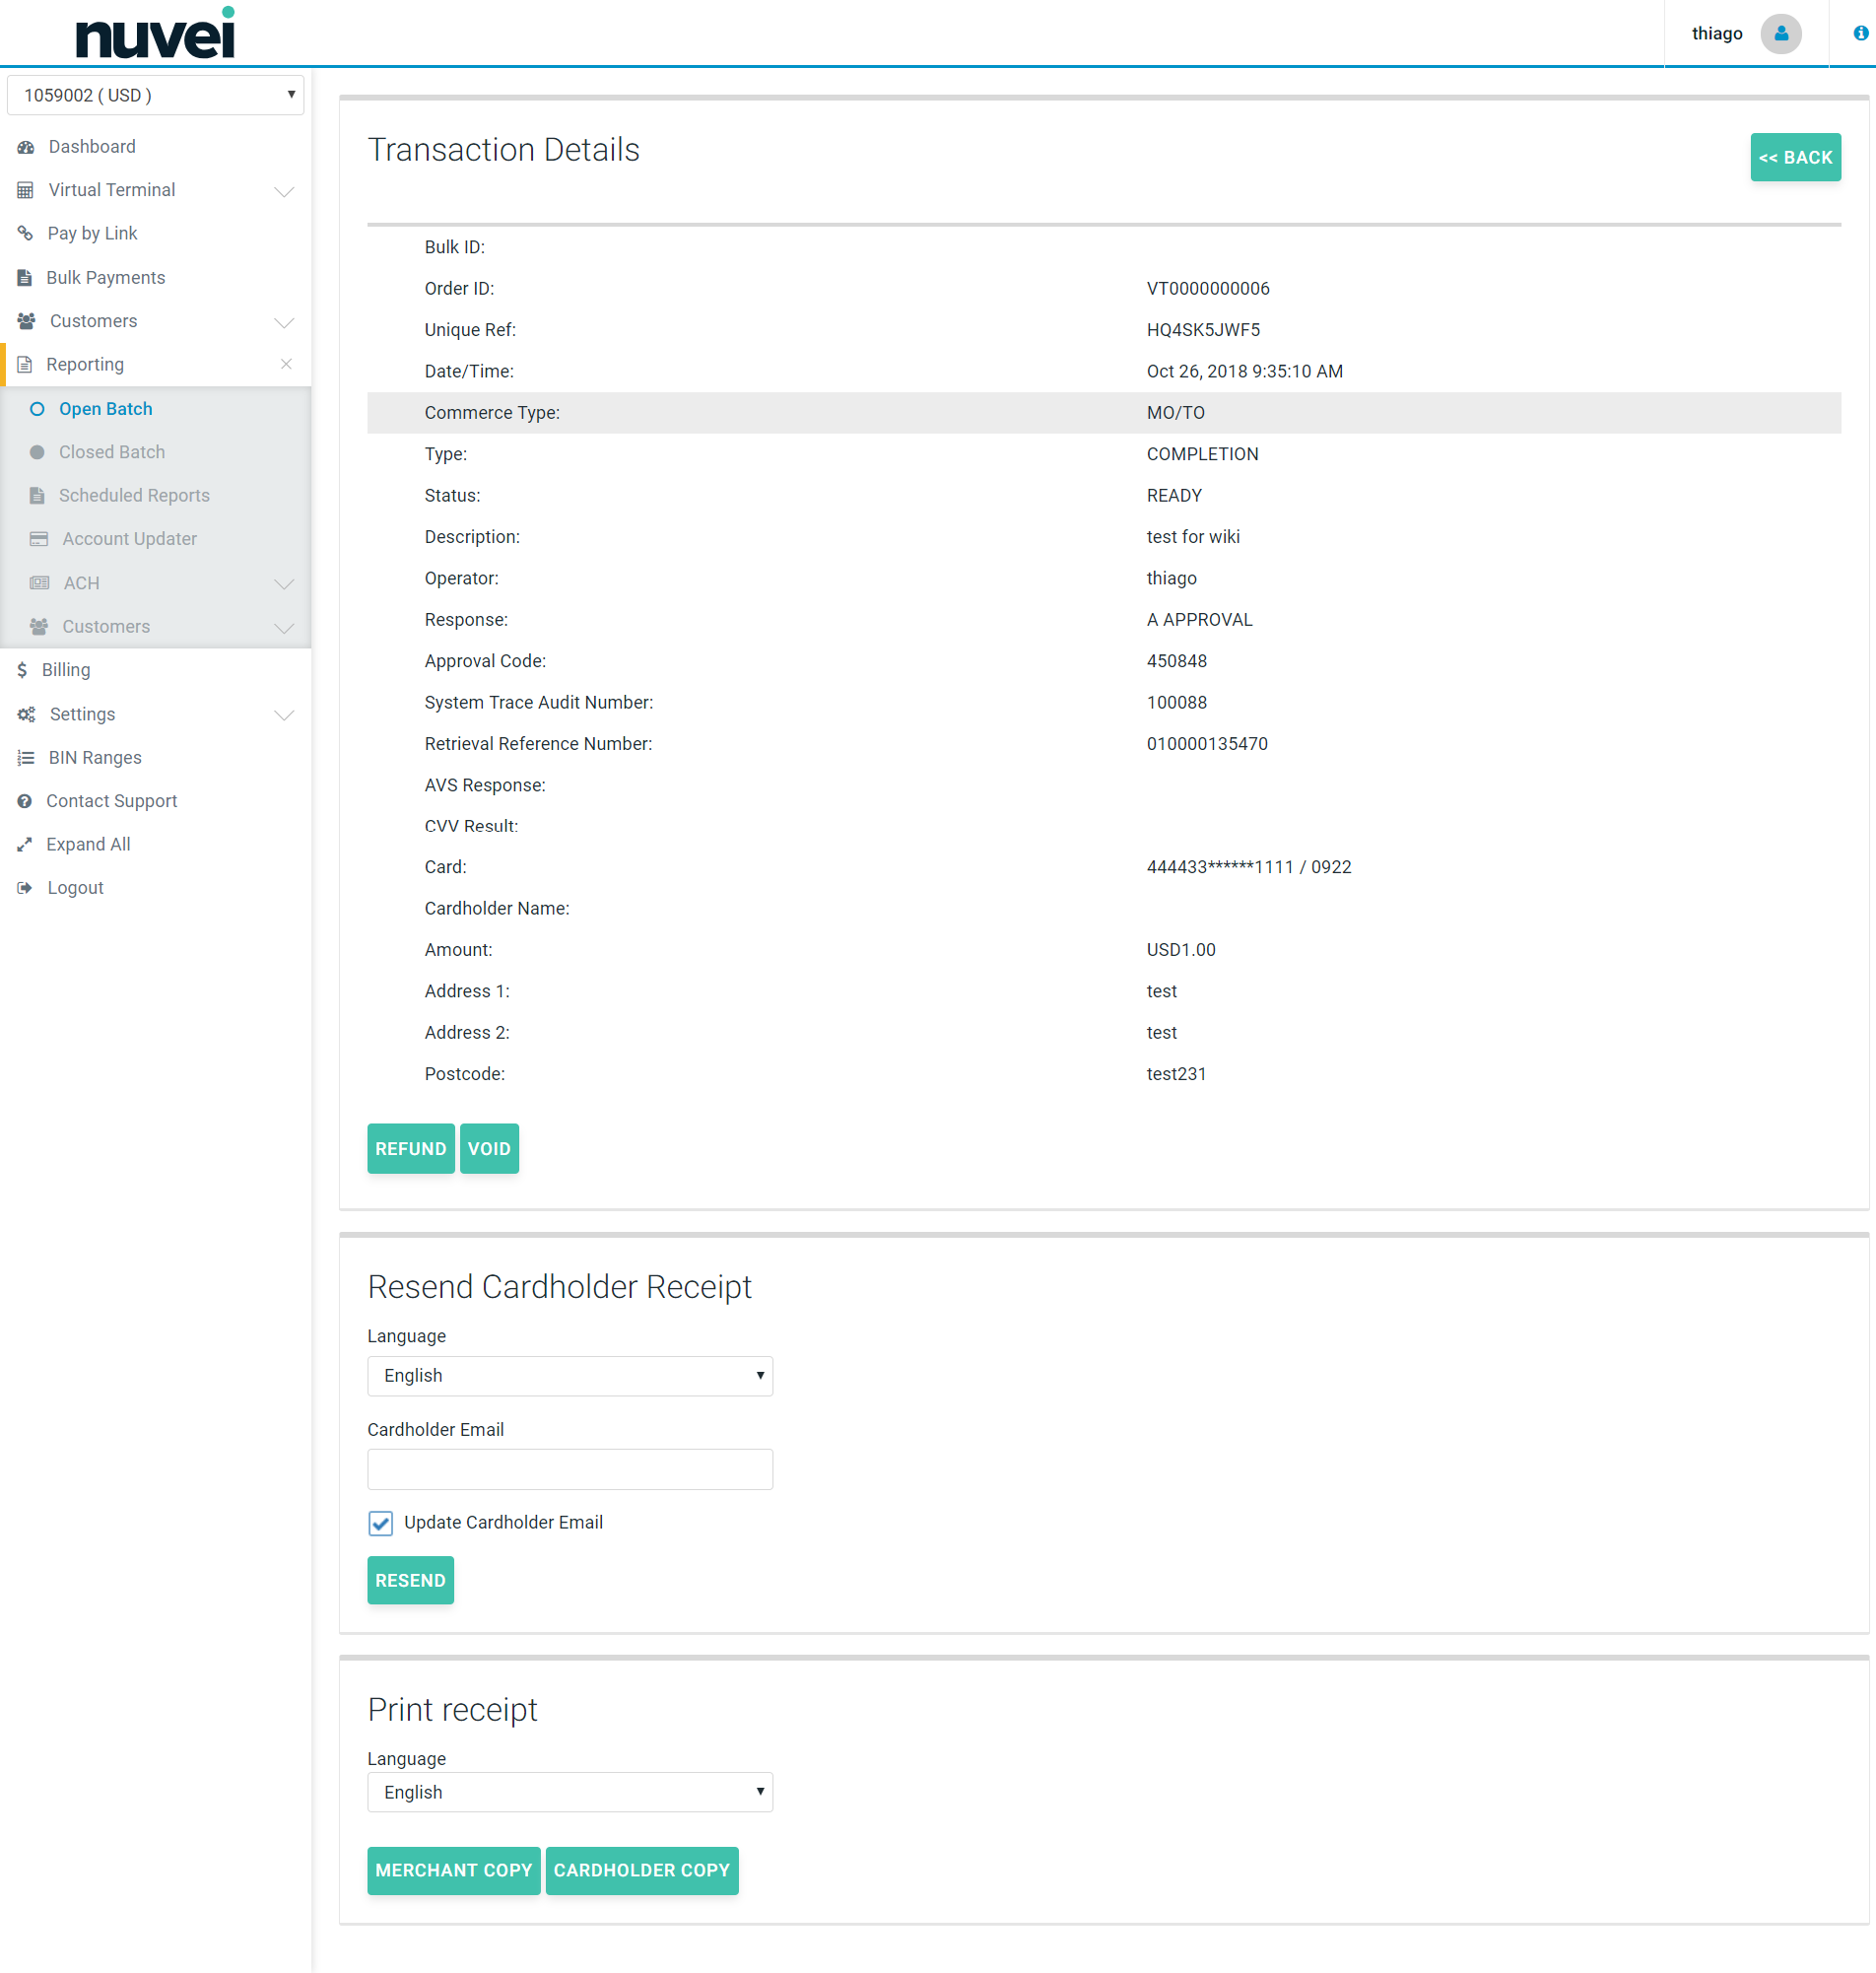
You can also void or refund the transaction at this stage by clicking on the “Refund” or “Void” button in the bottom right corner.
If your Terminal is enabled for Secure Tokens and Subscriptions, you can also Save Card or Create Subscription from the transaction details page. If you select one of these options the SelfCare System is going to create the Secure Token based on the details of the transaction and if you desire to create a subscription, besides creating the Secure Token, you are going to be redirected to the subscription creation page with a few fields already filled.
It is also possible to print the Merchant Copy or Cardholder Copy of the transaction's receipt, if needed, or Resent Cardholder Receipt by e-mail.
If your Terminal is enabled for Secure Tokens, and Subscriptions, you can also Save Card or Create Subscription from the transaction details page. If you select one of these options the SelfCare System is going to create the Secure Token based on the details of the transaction and if you desire to create a subscription, besides creating the Secure Token, you are going to be redirected to the subscription creation page with a few fields already filled.
It is also possible to print the Merchant Copy or Cardholder Copy of the transaction's receipt, if needed and depending on the languages configured on the platform, you can also choose in what language the receipt should be.
Additionally, it's also possible to Resend the Cardholder Receipt to the customer's e-mail.
![]()
Depending on your Terminal Settings, Another information might be added to the transaction Details: the Fraud Solution Events. These events are related to the Fraud Solution feature in your terminal, and are only applied when the feature is used.
If your terminal is enabled with enhanced data (Level II and III), the Open Batch page will contain columns for Level II and III eligibility by transaction.

Hover over transaction status for additional information.


If a transaction has a red or green status, click from the Action Column to add data.

Select Add Enhanced Data to enter information to qualify for Level III.

Closed Batch

After performing a transaction, the transaction will appear in Open Batch. After settlement, the transaction is moved to Closed Batch and grouped by settlement date.
Closed Batch is located with the Reporting section on Selfcare. Below are the functions available in Closed Batch.
- • View closed batches by date, on a terminal or all the merchant's terminals that the user as access.
- • View and perform operations (subscriptions, refunds, etc.) for transactions within a closed batch.
- • Export all transactions for a closed batch to a CSV file.
- • View total volume and amount of transactions within a batch and in different periods (day, week, month).
- • Search transactions in multiple closed batches and in different terminals.
- • View transaction details.
- • Refund settled transaction.
- • Resend cardholder receipts.
- • Print merchant or cardholder receipts.
After opening Closed Batch, there are 2 tabs at the top: Batches and Transactions. We cover these separately below.
Batches Tab

The top of the Batches section will allow you to perform searches to retrieve a particular batch. You can search for a batch on a single terminal or multiple terminals. Search for a specific date or a date range. If your search has any matches, a table will deploy all the results available.
In the graph section, the top menu will provide a summary of the settled transactions for different periods:
- • Last Batch: Provides details of the latest settled batch.
- • This Week: Provides details about batches settled within the current week.
- • This Month: Provides details about batched settled in the current month.
Each of these different menus will display graphs according to the period selected.

The first graph for single currency terminals is Net Total, with the total amount settled in the time frame selected. For multicurrency terminals, the Net Total is displayed in a bar chart indicating the volume of transactions separated by currency; on mouse-over an information bubble will show the total amount for each currency.
The second graph is a pie chart with information about the transactions’ status within the timeframe selected.
The third graph will indicate the transaction volume per hour, weekday, or day depending on the time frame selected. This data can be used for tracking the impact of marketing efforts, sales events, email campaigns, etc.
The next section contains a list with a breakdown of transactions per currency with Charged Amount, Charged Transactions, Refunded Amount, Refunded Transactions, and Net Total details. Clicking on the arrow to the left will break down the transactions for each currency per card brand (only card brands with transactions will display here).

Below the currency breakdown, we find the Batch List of the period range selected (Last Batch, This Week, This Month). This is a list of all batches included in that period range. Clicking on the date will show all transactions included in that particular batch. On the right side, an action menu will appear when the user clicks on the dots [∙∙∙] menu. Three different actions will be presented:

- • View Batch Transactions: Displays all transactions within the batch. The user can use this or click on the date/time link in the table.
- • View Batch Summary: Displays a summary of the batch with a detailed graph and breakdown of transactions divided by currency.
- • Expert as CSV: Will export all transactions to a CSV file format.
The first 2 items will be explored in the Batch Transactions and Batch Summary sections below.
Transactions Tab

For the Transactions section, you can locate a transaction using multiple criteria:
- • Terminal ID
- • Order ID
- • Unique Ref
- • Card Number (first 6 and last 4 digits)
- • Transaction Date
- • Cardholder Name
- • Amount
- • Retrieval Number
Additional search criteria can be added as needed. If the search criteria results in a large amount of data, you will need to narrow your search or utilize Scheduled Reports to retrieve the data. A notification is displayed if you hit the limit on the amount of data that can be retrieved when using the search feature in Closed Batch.
Schedule Reports can be found under the Reporting Menu in Selfcare.

If any transaction matches the query, the system will display them in the table. Clicking on the left arrow will open additional information about the transaction. The line to the left of the transaction will change colors based on the status of that transaction. Green means the transaction was COMPLETE, yellow means PENDING, red means DECLINED, and gray for any other response. Clicking on Order ID will display the transaction details panel.
You can quickly perform actions on the transactions listed by clicks on the dots [∙∙∙] menu.
- • View the transaction details
- • Refund the transaction
- • View Sentinel Defend Events (if enabled for your terminal)
- • Resend the cardholder receipt
- • Print receipt
- • Create a Secure Token or Subscription

- • Transaction Details to view additional information about a transaction

- • Refund allows the user to perform a quick refund. The Refund Panel will display details about the transaction and will ask the user the amount and reason for the refund to be performed.

- • Resend Cardholder Receipt will open a panel with an input field asking for an email address. The user can click on the Update Cardholder email checkbox to update the email address used during the transaction. Also, in multi-language terminals, it will ask for a Receipt Language.

- • Print Receipt will open a panel where the user can select different languages (if available) and two buttons indicating if the user requires a Merchant Copy or a Cardholder Copy.

- • Create Secure Token allows the user to create a Secure Token using the same card used to perform the transaction. This is a handy option to create Subscriptions or additional sales using the same card in the future. This is enabled only in certain terminals. If you require this feature, please contact your vendor.

- • Create Subscription after creating a Secure Token, the user can create a Subscription directly on Closed Batch. There is an option to change the Notification Language and to set a specific start and end date.

Batch Summary
The Batch Summary will display information about the selected batch. It has the same details as the grouped batch summary covered in the Batch section.

The first graph for single currency terminals is Net Total, with the total amount settled in the batch selected. For multicurrency terminals, the Net Total is displayed in a bar chart indicating the volume of transactions separated by currency, on mouse over an information bubble will display the total amount for each currency.
The second graph is a pie chart with information about the statuses of the transactions for the selected batch.
The third graph is the volume of transactions per hour.
Below the graphs, there is a table with a breakdown of transactions per currency with details about Charged Amount, Charged Transactions, Refunded Amount, Refunded Transactions and Net Total. Clicking on the arrow to the left, will break down the transactions for each currency per card brand (only card brands with transactions will display here).
Batch Transactions

In the Batch Transactions section you can search for a specific transaction within a batch. It also allows the use of Custom Fields in the search queries. The left bar indicates the status of that transaction and the arrow at the left displays further information about the transaction. Clicking on the Order ID will bring the transaction details.
For each transaction available on screen, there are a number of actions available. The Actions Menu will appear when the user clicks on the dots [∙∙∙] menu.

Transaction Details to view additional information about a transaction.

Refund allows the user to perform a quick refund. The Refund Panal will display details about the transaction and will ask the user the amount and reason for the refund to be performed.

Resend Cardholder Receipt will open a panel with an input field asking for an email address. The user can click on the Update Cardholder email checkbox to update the email address used during the transaction. Also in multi-language terminals, it will ask for a Receipt Language.

Print Receipt will open a panel where the user can select different languages (if available) and two button indicating if the user requires a Merchant Copy or a Cardholder Copy.

Create Secure Token allows the user to create a Secure Token using the same card used to perform the transaction. This is a handy option to create Subscriptions or additional sales using the same card in the future. This is enabled only in certain terminals. If you require this feature, please contact your vendor.

Create Subscription after creating a Secure Token, the user can create a Subscription directly on Closed Batch. There is an option to change the Notification Language and to set an specific start and end date.

Scheduled Report
Scheduled Reports is a feature designed to facilitate the production of reports from past transactions processed by your terminals. Multiple Scheduled Reports can be created to suit your needs and the reports can be delivered by email or FTP. The Scheduled Report feature can be found after logging into the Selfcare system and is located under the Reporting section on the main menu.

If the Scheduled Report is not available in your terminal, please contact the support team to activate the feature.
Creating a Report
To create a report, the Merchant only needs to inform the settings and at the given time, the report is going to be generated and delivered as configured.
1. Add Report

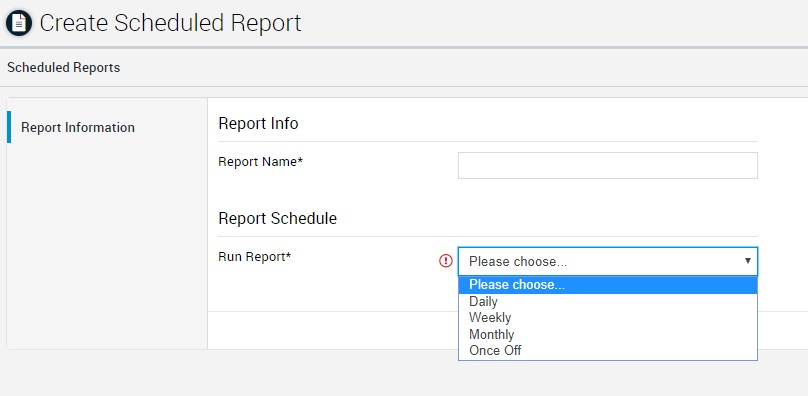
2. Enter Report Info
- Report Info: here you are going to inform the Report Name.
- Report Schedule: the Run Report field allows you to inform the periodicity of the report (Daily, Weekly, Monthly, Once Off custom-up to 12 months).
- *Custom reports may take up to an hour to be delivered.

3. Click Save.
- Please note that if you decided to produce a Once Off report, you will need to set the Start Date and End Date for your report. After the Once Off report is produced and delivered, it will be moved to the Inactive tab in the Schedule Report table.
4. Select how the Scheduled Report will be delivered and what information will be included in the reports. Click Delivery Methods.
Select Report Delivery Options
There are two ways to receive your Scheduled Report, via email and FTP.
- You can also receive your report using both options simultaneously.
- The reports are available on the Selfcare system in case you lose your email or your FTP server is offline.
Email Delivery
1. To receive your Scheduled Report by email, select the E-mail checkbox. An input field will be shown, add the email address here.
- To send to multiple email addresses, click Add and add a new email address.
- To remove one of the email addresses, click Remove.
2. After you finish adding all the email addresses, click Save.

FTP Delivery
1. To receive your Scheduled Report by FTP, click on the FTP checkbox. Fill the form with the details from your FTP server.
- Currently, the Scheduled Report feature supports accessing FTP servers with username and password.
2. Click Save.

Customize your Scheduled Report
To customize the report with the information that suits your needs, click Report Builder. The section is divided into two parts.
- Report Builder This functionality allows you to receive only transactions that are relevant for your report, e.g. only transactions with an amount greater than 100. You can add or remove filters clicking the “+” or “-” buttons.
- Report Columns In this area, you can choose what information is going to be available on your report. For example, you want to know the Card Type and Cardholder Email of all your transactions. You can also click Select All checkbox to receive all columns available in the report.


After selecting all the columns you need, click Save at the bottom of the screen to proceed.
Completed Scheduled Report
The Scheduled Report is ready and you will receive the report via the selected delivery method.
- If you have chosen the email delivery option, you will receive an email with a link to your report.
- If you have chosen to receive your report by FTP, your report will be available on your FTP server.
Scheduled Reports
On the Scheduled Report page there are three different tabs: All, Active and Inactive.
- Active will show only the Schedule Reports currently running.
- If you created a Once Off report, after it has been delivered it will be moved to Inactive.
To Edit a Report:
Click on its name in the table. This will open a form similar to the one used to create the Scheduled Report. You can edit the information there, select new delivery methods, add additional emails or just check the information that is being used to create the report.

To Delete a Report
On the Action column, there are different actions available.
- If the report is active, you can make it inactive by selecting Set as Inactive.
- In case you no longer need that report to be generated, you can select Delete Scheduled Report.

Downloading Reports
For each Scheduled Report, the latest report is available on Selfcare. On the Action column, click on the “…” and there will be an option to download the latest report.
- The reports are generated in ZIP format containing a CSV file that can be opened in any spreadsheet software such as Microsoft Excel, Google Sheets or Apple Numbers.
Account Updater
The Account Updater report enables you to keep track of the updated Secure Tokens in your Terminals, making possible:
- I) To track the changes made to the accounts associated to your Secure Tokens.
- II) Understand changes which may be causing transaction decline (based on statuses).
- III) Export those “updates” to a CSV file.
- IV) See the amount of changes already updated to your Secure Token.
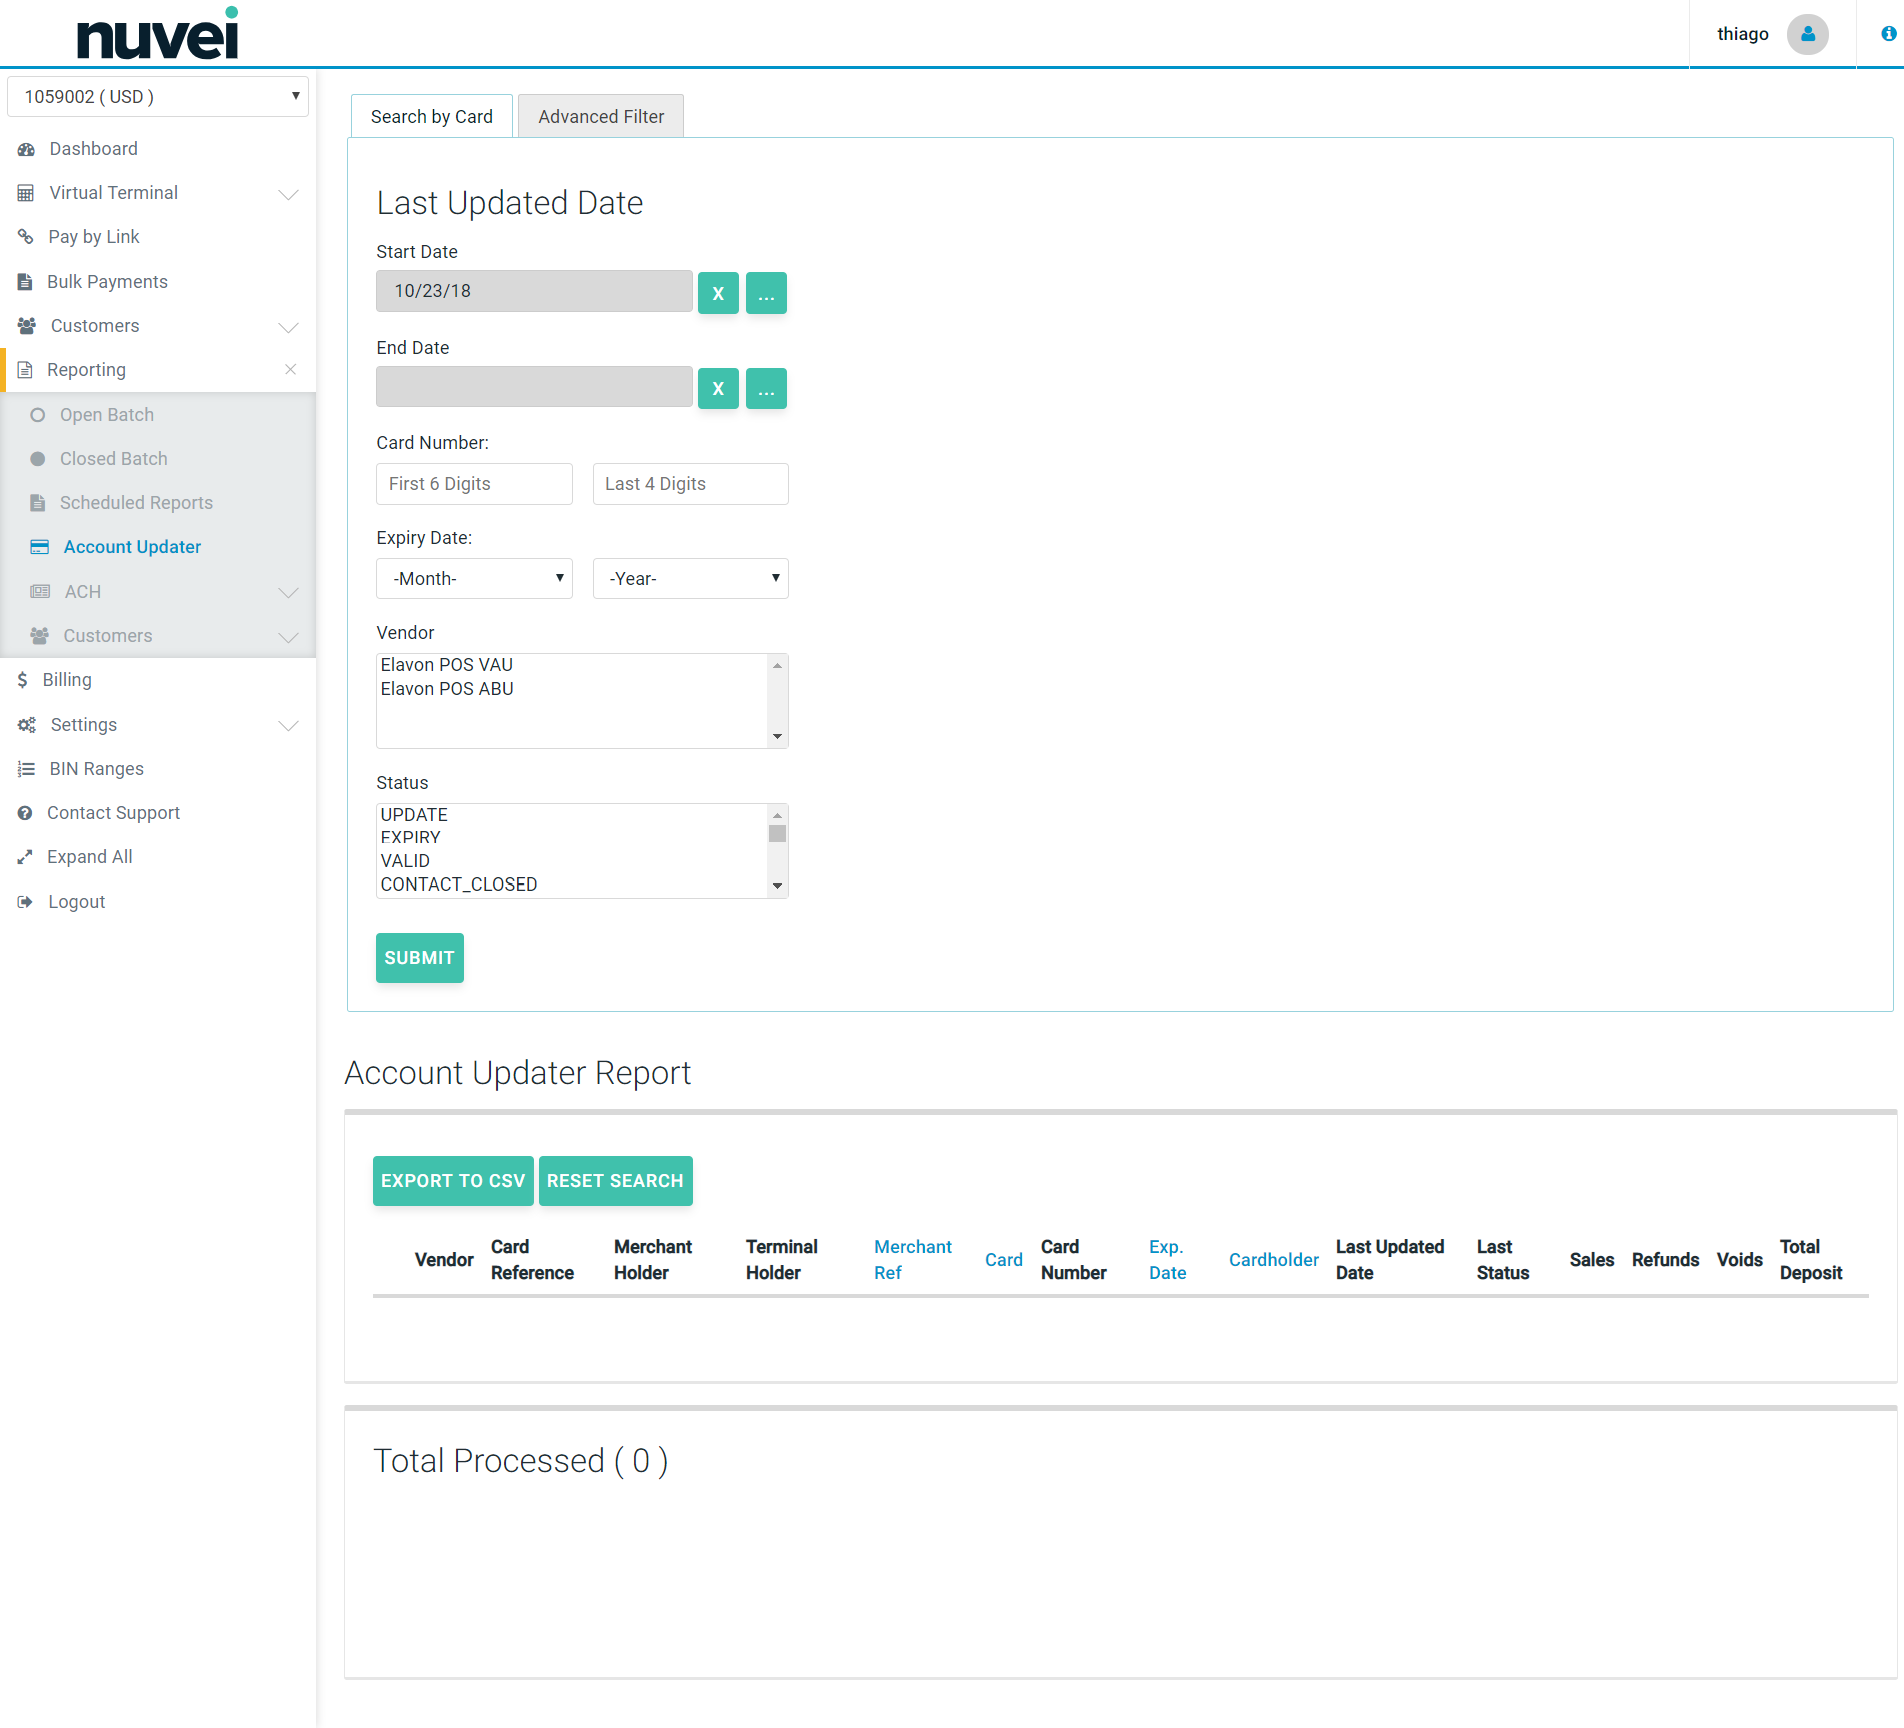
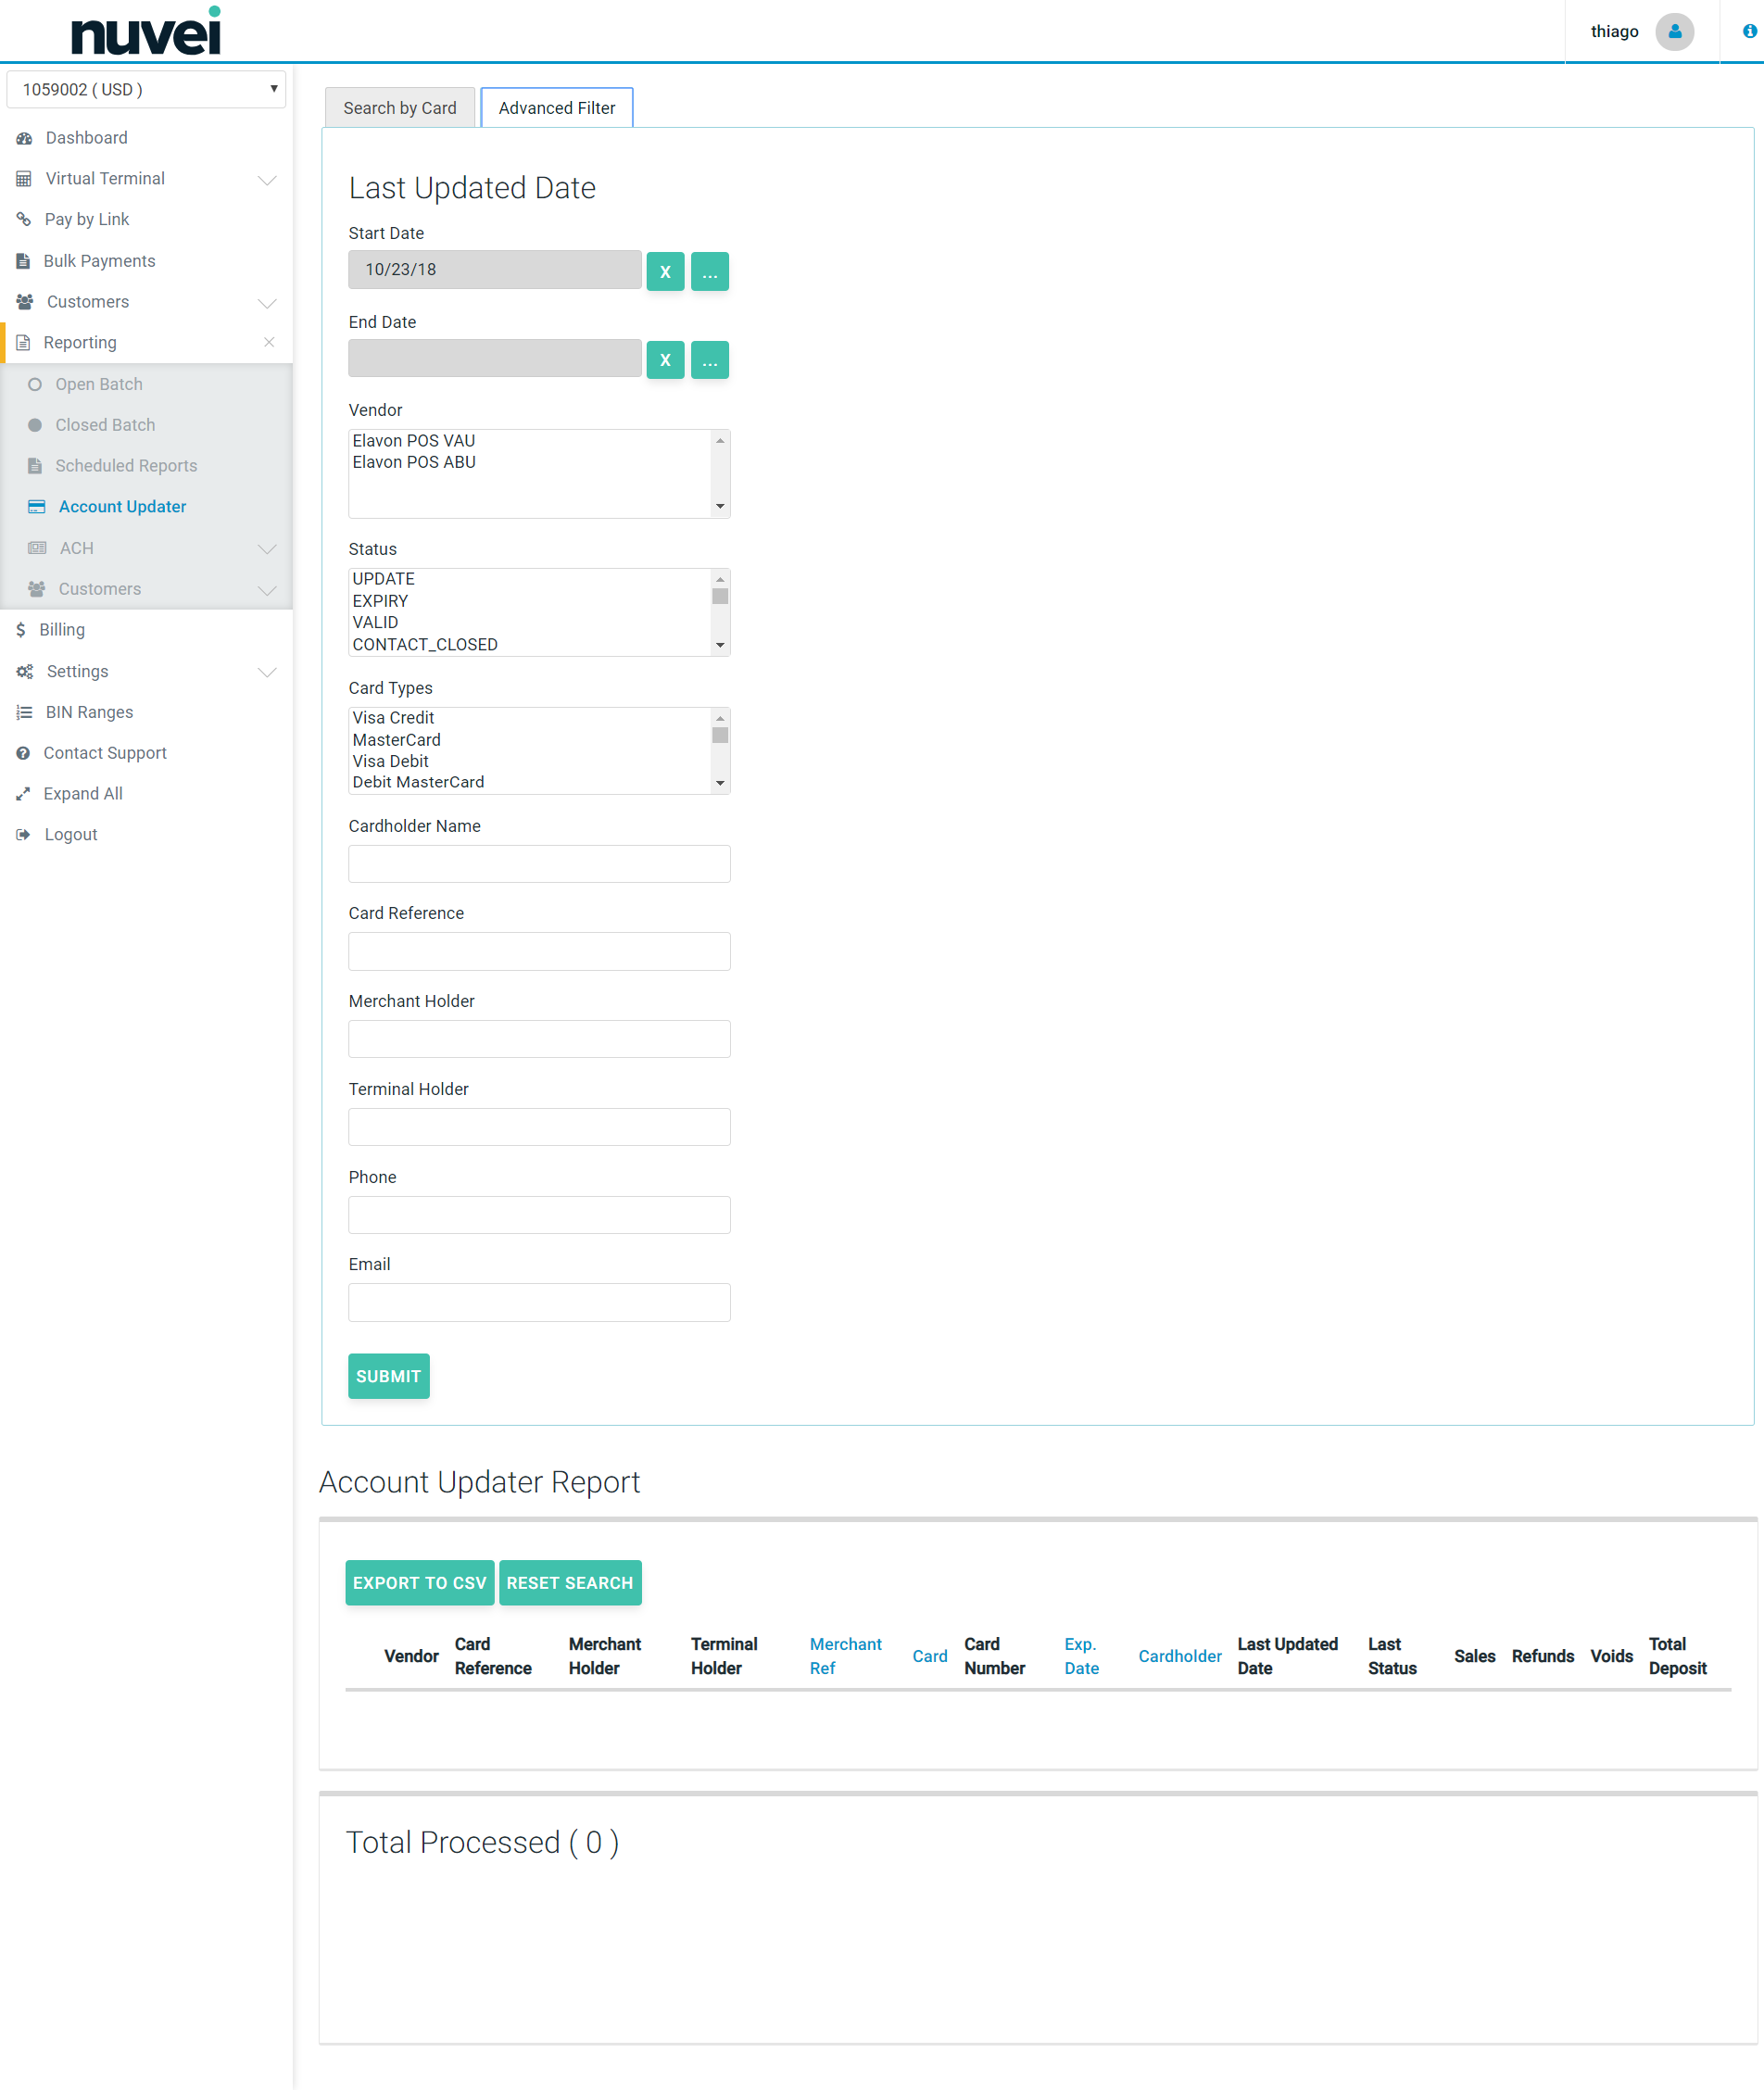
This features allows you to filter your search by the card details, the provider of the Account Update service or the change type, as you can see in the next two images.
Account Updater Report - Search By Card
Account Updater Report - Advanced Filter
Account Updater Report - Search Result
Following the result of the report, when applied any search, you would be able to see the list of changes already registered by the Account Updater feature, as shown in the next image. Among the data informed, you are going to find the provider or the account update service (vendor), the secure token and card details (card reference, merchant holder, terminal holder, merchant reference, card, masked card number, expiration date, cardholder), the card update details (las update date and status) and payment details (total and volume of sales, refunds, voids and total deposit on that secure token).
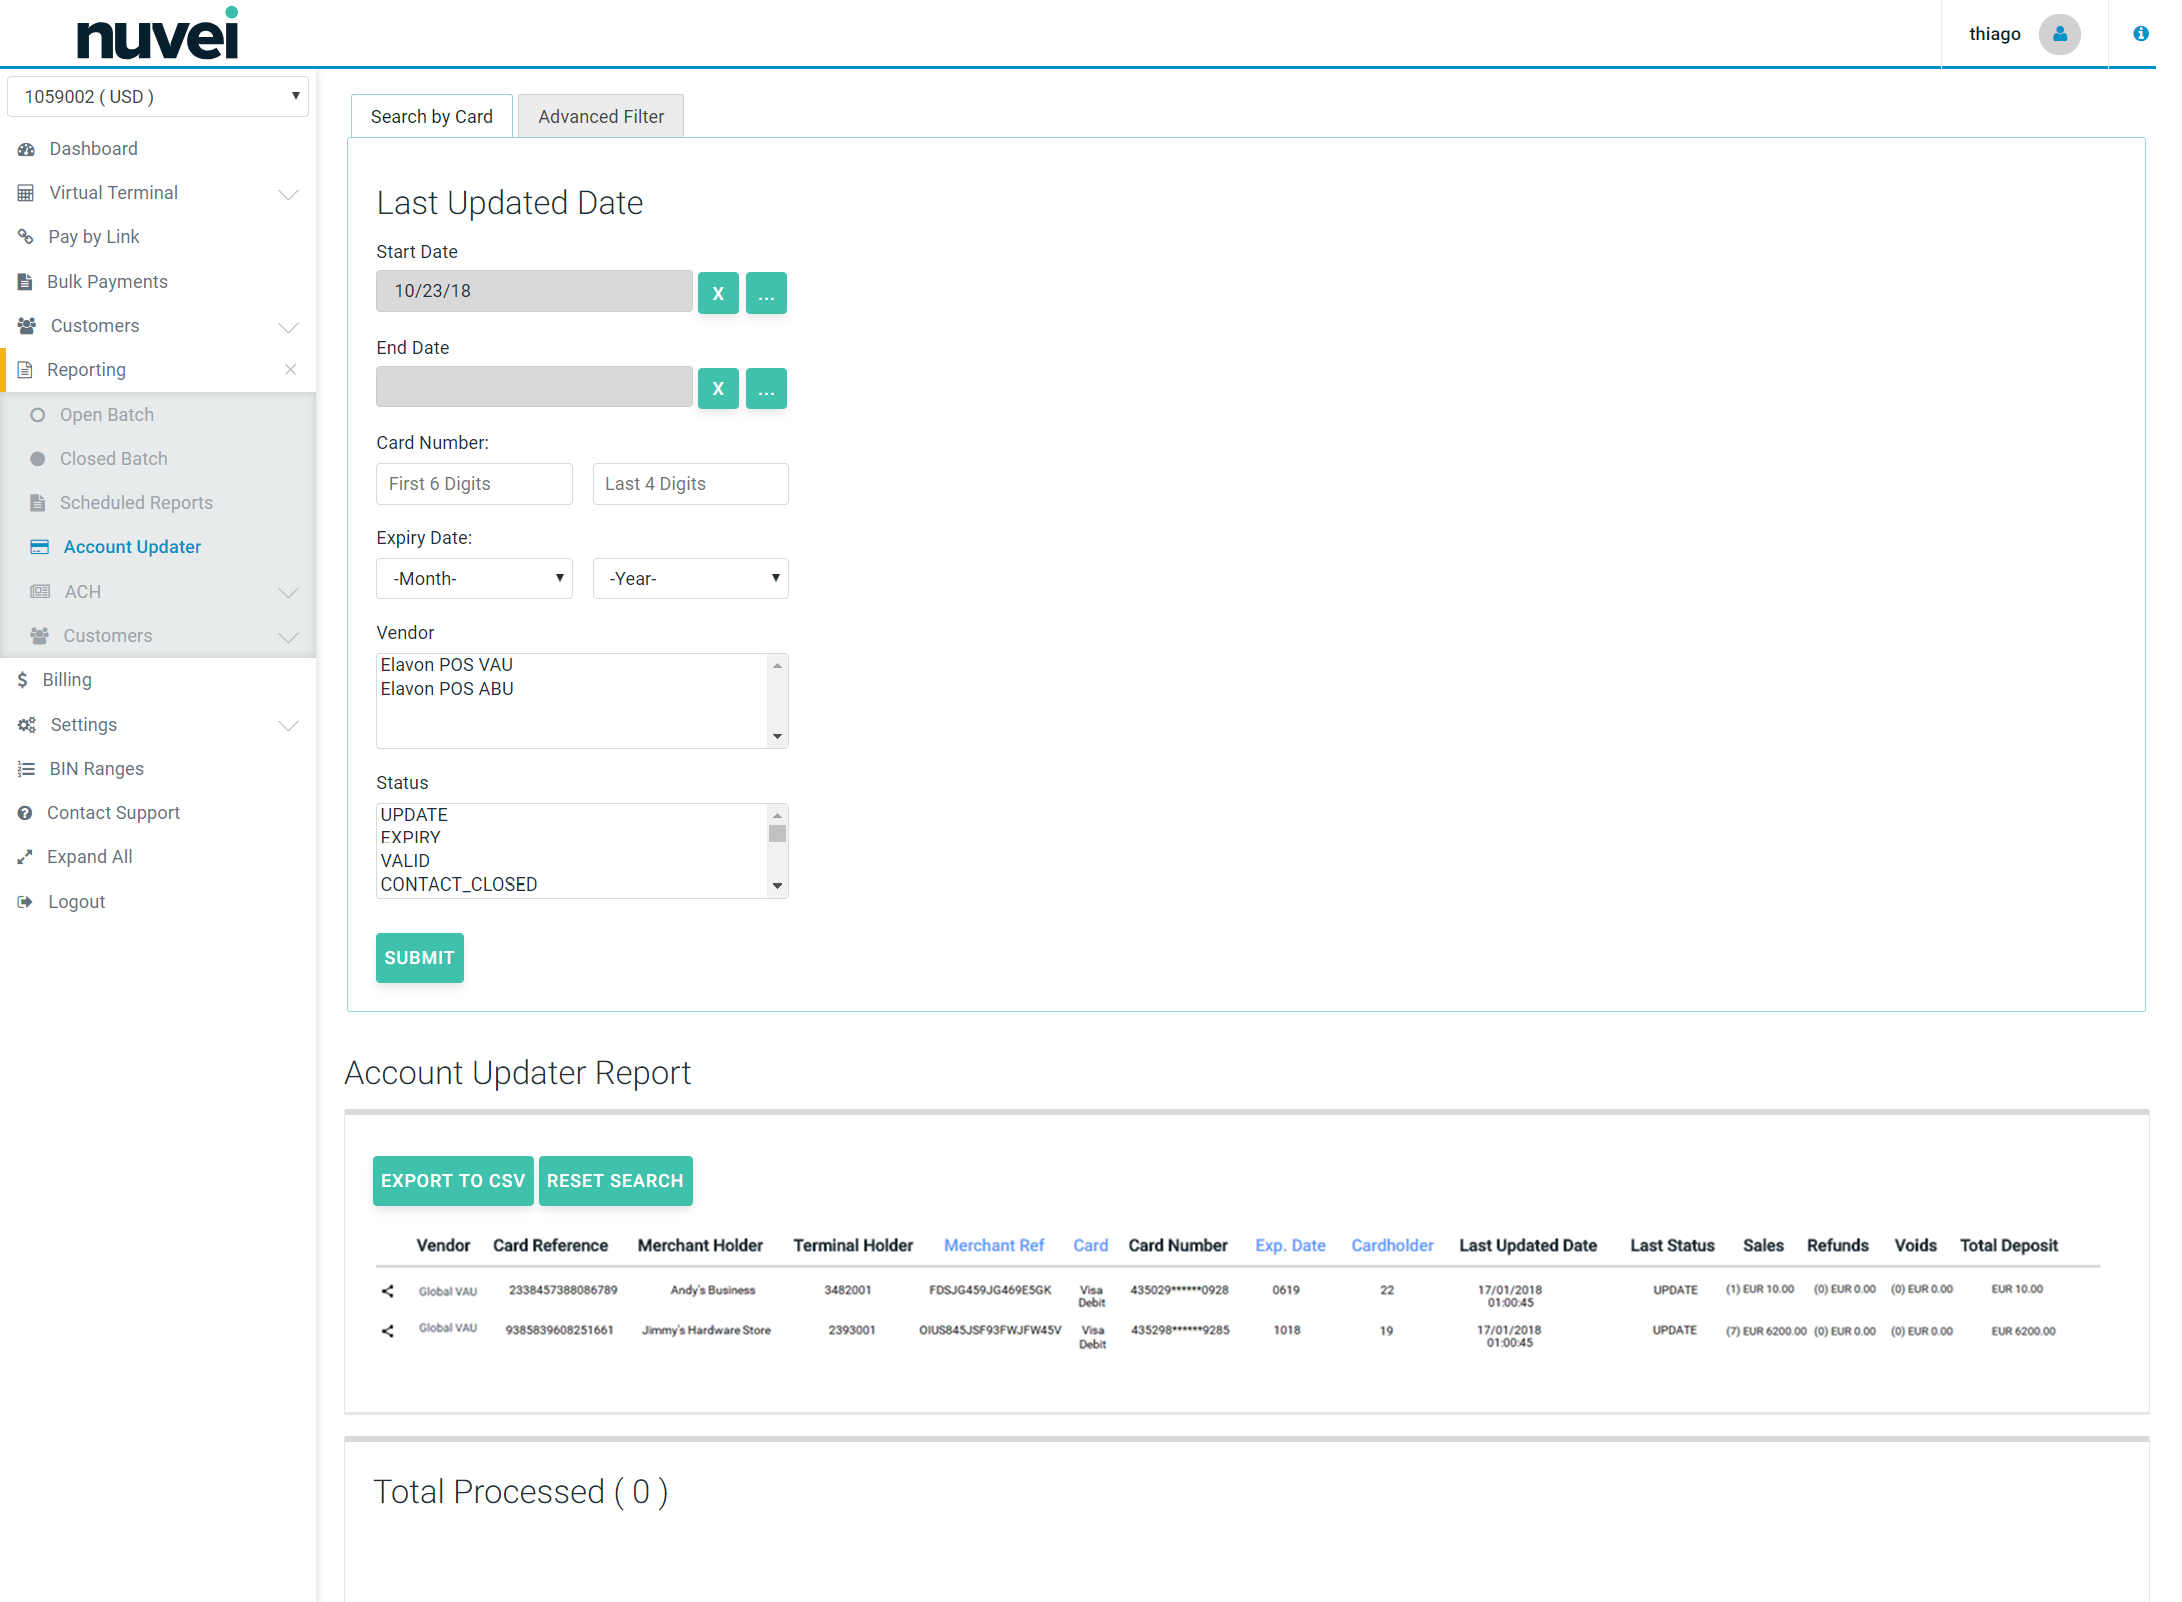
It's important to understand that, besides the informative function, the Merchant should understand what each status mean and if they have any impact in its future transactions.
Statuses for Each Registered Update
Filter:
| NAME | DESCRIPTION |
|---|---|
| VALID | No updates performed. SC details are still valid. |
| UPDATE | Account number or account number, plus expiration date were updated. |
| EXPIRY | Just expiration date was updated. |
| CONTACT_CLOSED | Account was closed (Secure Token invalid). Merchant should contact the cardholder. |
| UNKNOWN | Account number could not be found. SC details are not valid anymore. |
| IN_PROCESS | The updating of this SC details is still in progress. It will change to one of the other statuses as soon as it's finished. |
| CONTACT | Merchant should contact the cardholder. |
| PARTICIPATING | No Match from participating bin issuer (not sure what merchant should do). |
| NON_PARTICIPATING | No Match from non-participating bin issuer (I think this card is not eligible for account updater). |
| UNDEFINED | VAU or ABU returned status_unknown. |
| ER_000101 | Error while updating: Non-numeric Account Number. The SC Details are not valid anymore. |
| ER_000102 | Error while updating: Account Number is not in BIN Range. The SC Details are not valid anymore. |
| ER_000103 | Error while updating: Invalid Expiration Date. The SC Details are not valid anymore. |
| ER_000104 | Error while updating: Merchant Not Registered. The SC Details are not valid anymore. |
| ER_000122 | Error while updating: Un-registered Sub-merchant. The SC Details are not valid anymore. |
| ER_UNSUPPORTED_RESPONSE_CODE | Error while updating: Unsupported response code from the updater service. The SC Details are not valid anymore. In this case, you should contact the Payment Gateway Support team to open an investigation to see what the response code is, and update possible valid responses. |
ACH
In case you are using a terminal which can perform ACH Transactions, a separated report option is made available under Reporting > ACH, with those transactions, as you can see at the menu on the following images.
Each report focuses on a specific transaction state, such as:
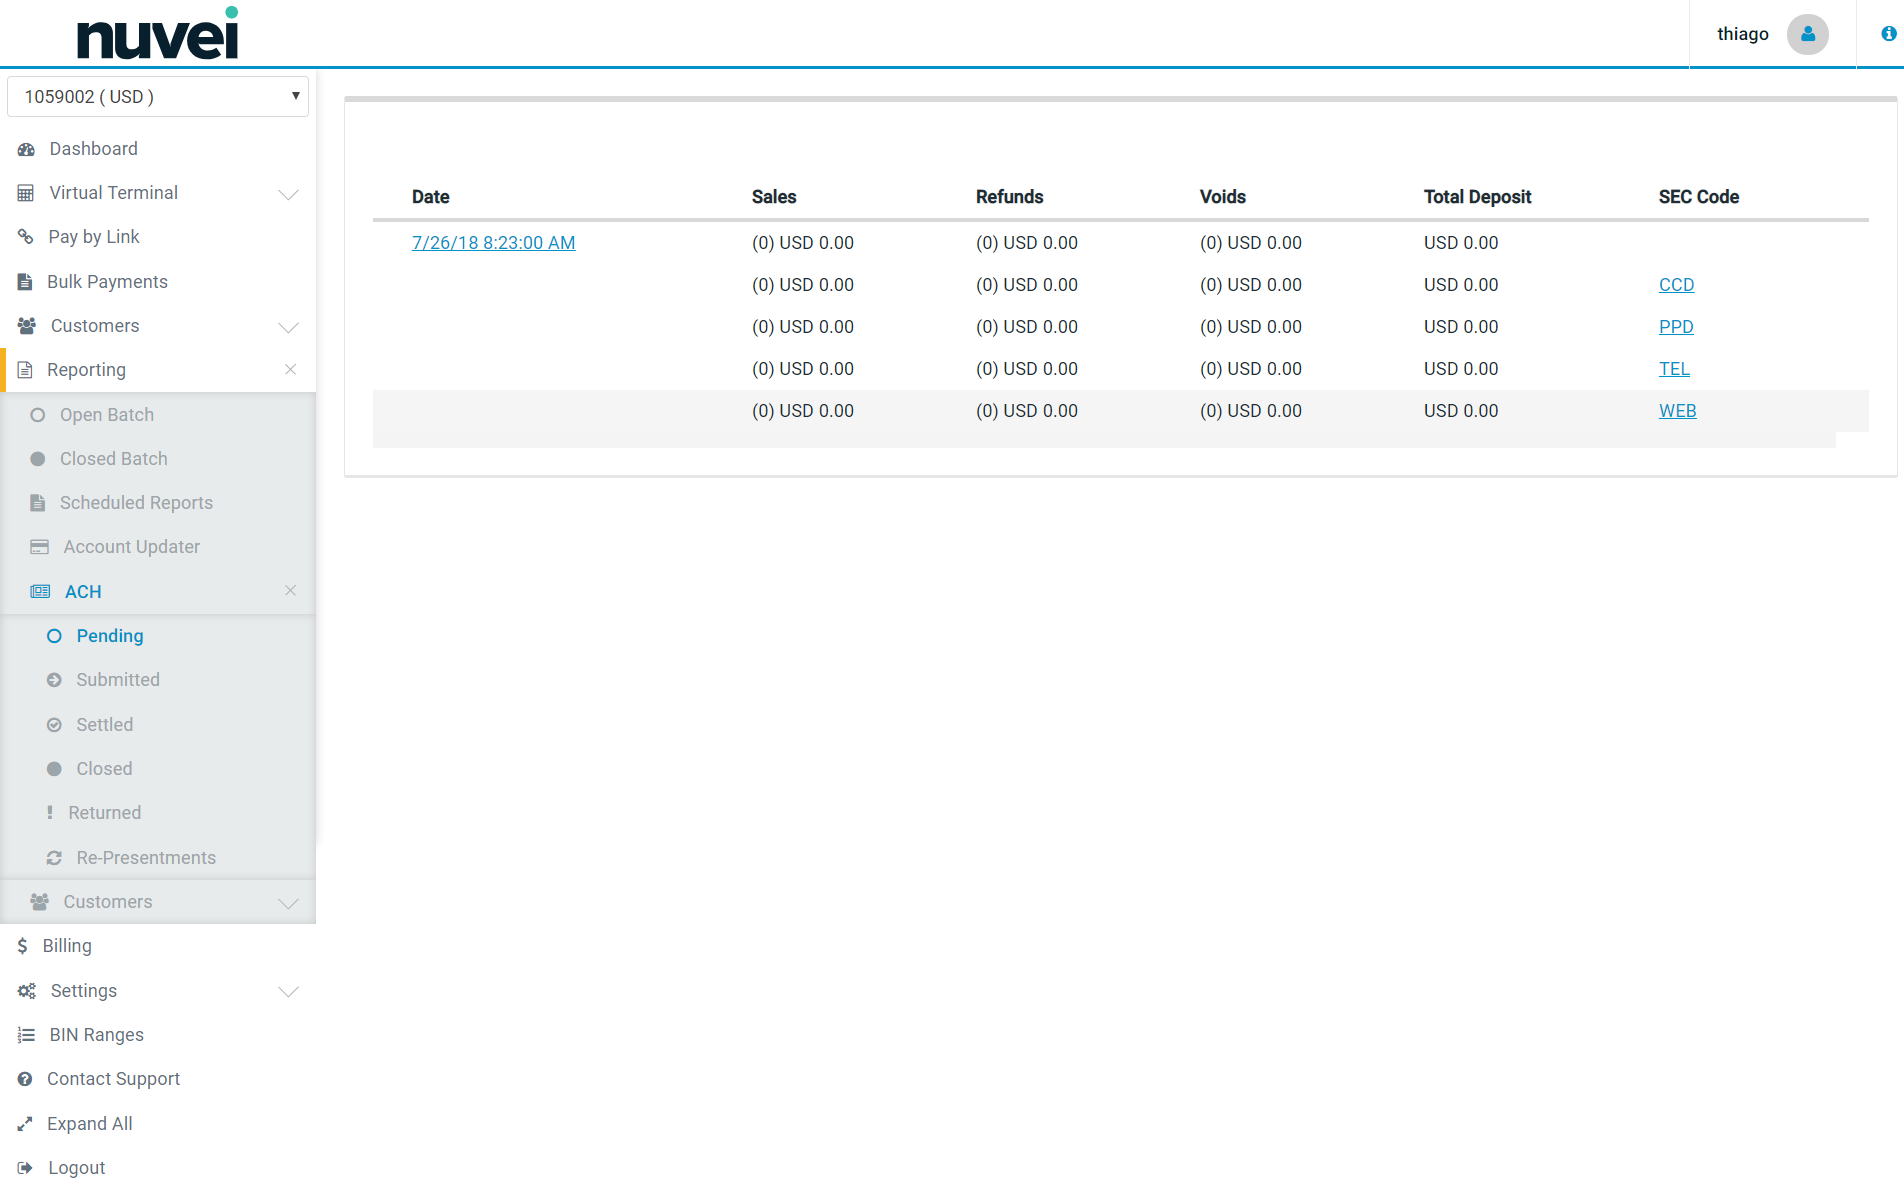
Pending Transactions
This report presents all the ACH pending transactions for the used terminal:
- I. Grouped by Date.
- II. With a link (click on the date) to show the detailed list of transactions on that date.
- III. Detailed in five summarizing lines for the transactions performed on that date:
- a) The first top line (aligned with the date) represents the sum of the remaining 4 lines (that's why its SEC Code column is always empty).
- b) Each of the four remaining lines represents the total volumes for transactions of each one of the Sec Codes - CCD, PPD, TEL and WEB (refer API Specification - ACH JH to know a little bit more about SEC Codes). Additionally, a link is also provided for each SEC Code to the list of transactions with that code on that date.
- c) Additionally, each line also groups the transactions as Sales, Refunds and Voids by quantity, represented by the value between “()”, followed by its total resulting amount. The Total Deposit totalizes those three types (Sales - Refunds - Voids).
Submitted Transactions
This report presents all the ACH submitted transactions for the used terminal:
- I. Grouped by Date.
- II. With a link (click on the date) to show the detailed list of transactions on that date.
- III. Detailed in five summarizing lines for the transactions performed on that date:
- a) The first top line (aligned with the date) represents the sum of the remaining 4 lines (that's why its SEC Code column is always empty).
- b) Each of the four remaining lines represents the total volumes for transactions of each one of the Sec Codes - CCD, PPD, TEL and WEB (refer API Specification - ACH JH to know a little bit more about SEC Codes). Additionally, a link is also provided for each SEC Code to the list of transactions with that code on that date.
- c) Additionally, each line also groups the transactions as Sales, Refunds and Voids by quantity, represented by the value between “()”, followed by its total resulting amount. The Total Deposit totalizes those three types (Sales - Refunds - Voids).

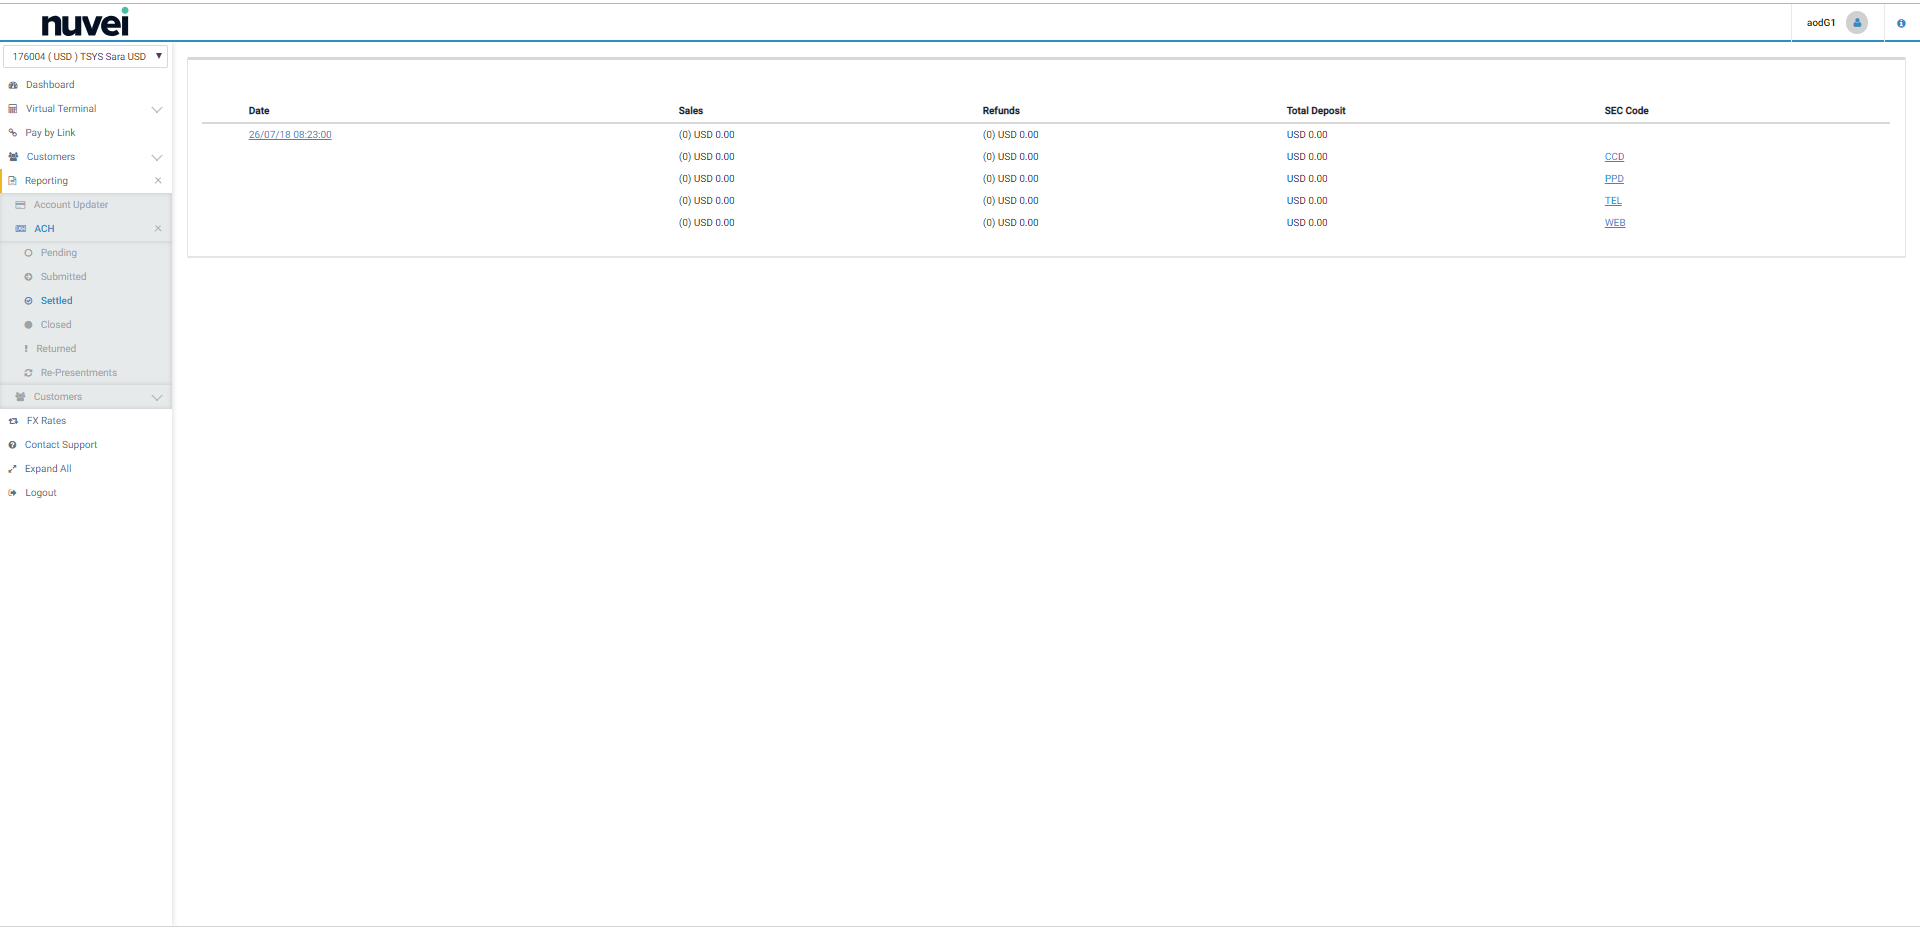
Settled Transactions
This report presents all the ACH settled transactions for the used terminal:
- I. Grouped by Date.
- II. With a link (click on the date) to show the detailed list of transactions on that date.
- III. Detailed in five summarizing lines for the transactions performed on that date:
- a) The first top line (aligned with the date) represents the sum of the remaining 4 lines (that's why its SEC Code column is always empty).
- b) Each of the four remaining lines represents the total volumes for transactions of each one of the Sec Codes - CCD, PPD, TEL and WEB (refer API Specification - ACH JH to know a little bit more about SEC Codes). Additionally, a link is also provided for each SEC Code to the list of transactions with that code on that date.
- c) Additionally, each line also groups the transactions as Sales, Refunds and Voids by quantity, represented by the value between “()”, followed by its total resulting amount. The Total Deposit totalizes those three types (Sales - Refunds - Voids).
Closed Transactions
This report presents all the ACH closed transactions for the used terminal:
- I. Presenting an option to search the transaction based on a simple filter.
- II. Grouped by Date.
- III. With a link (click on the date) to show the detailed list of transactions on that date.
- IV. Detailed in five summarizing lines for the transactions performed on that date:
- a) The first top line (aligned with the date) represents the sum of the remaining 4 lines (that's why its SEC Code column is always empty).
- b) Each of the four remaining lines represents the total volumes for transactions of each one of the Sec Codes - CCD, PPD, TEL and WEB (refer API Specification - ACH JH to know a little bit more about SEC Codes). Additionally, a link is also provided for each SEC Code to the list of transactions with that code on that date.
- c) Additionally, each line also groups the transactions as Sales, Refunds and Voids by quantity, represented by the value between “()”, followed by its total resulting amount. The Total Deposit totalizes those three types (Sales - Refunds - Voids).
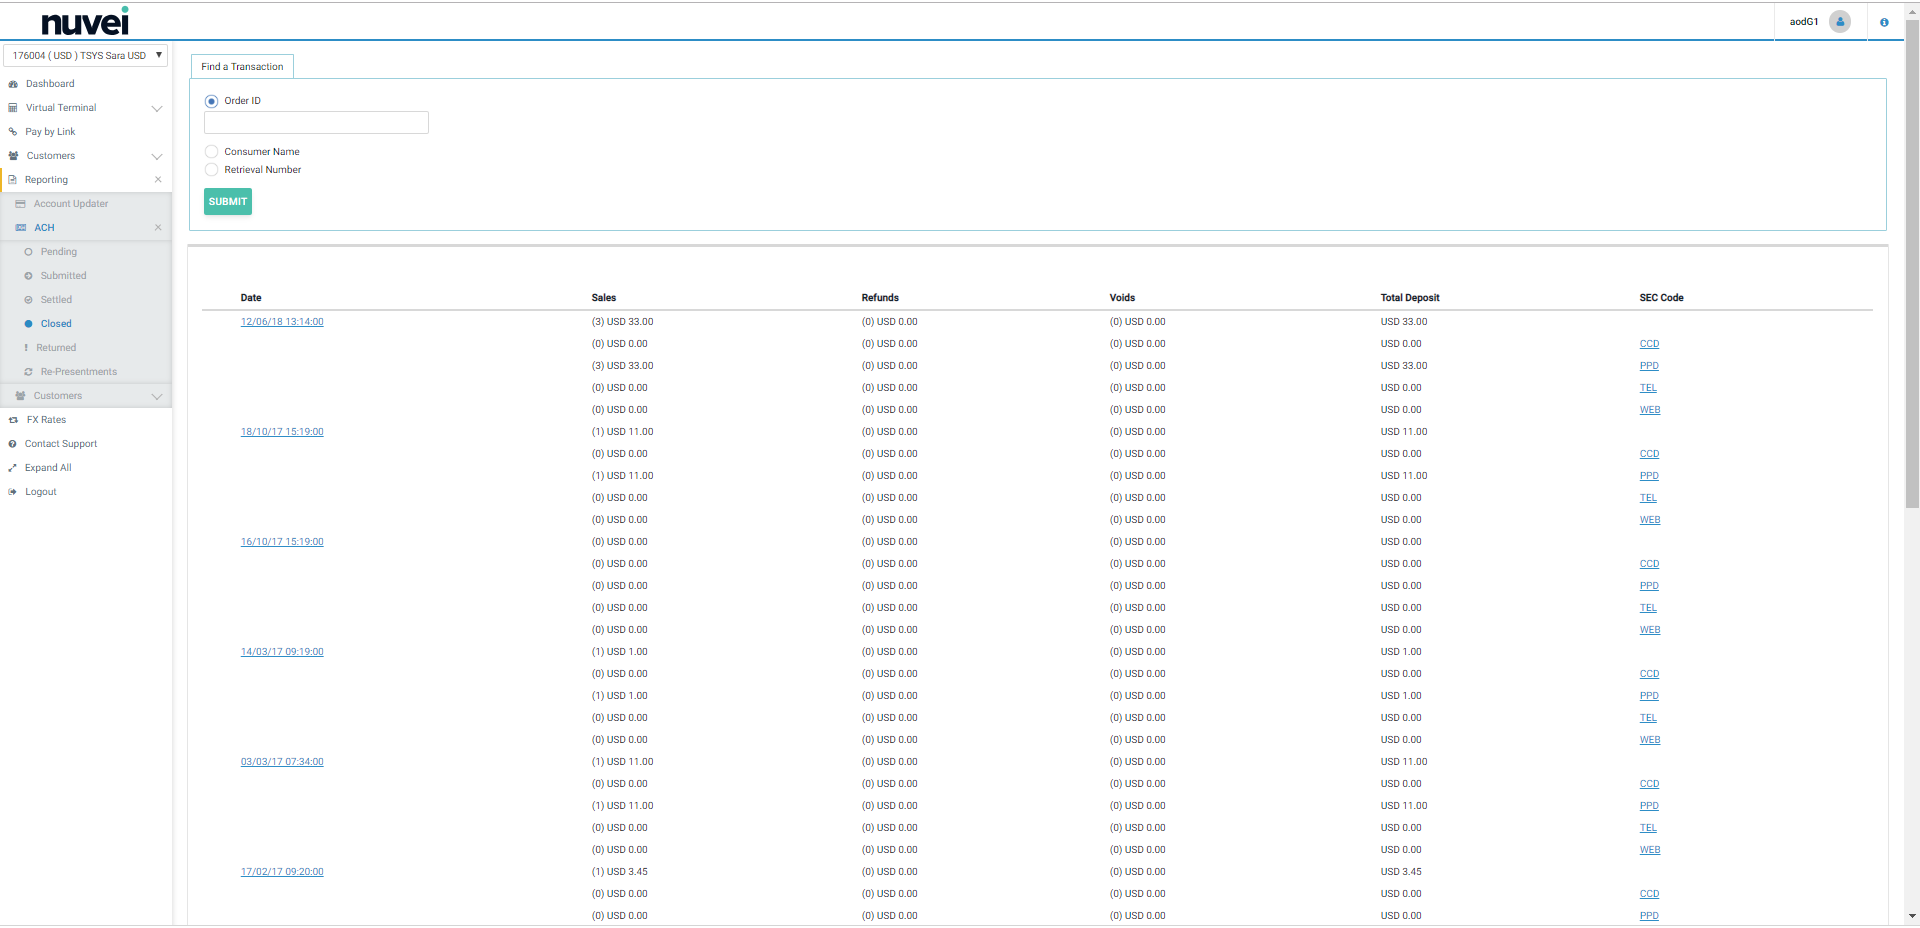
In case you desire to see more details or simple look for a specific transaction from a specific data, whenever you click on a date you are going to be presented to the image below, and if you click on the date link once more, te transaction details are presented.
![]()
Returned Transactions
This report presents all the ACH returned transactions for the used terminal:
- I. Presenting two search options for transactions: simple and advanced - with filters.
- II. Grouped by Date.
- III. With a link (click on the date) to show the detailed list of transactions on that date.
- IV. Detailed in five summarizing lines for the transactions performed on that date:
- a) The first top line (aligned with the date) represents the sum of the remaining 4 lines (that's why its SEC Code column is always empty).
- b) Each of the four remaining lines represents the total volumes for transactions of each one of the Sec Codes - CCD, PPD, TEL and WEB (refer API Specification - ACH JH to know a little bit more about SEC Codes). Additionally, a link is also provided for each SEC Code to the list of transactions with that code on that date.
- c) Additionally, each line also groups the transactions as Sales, Refunds and Voids by quantity, represented by the value between “()”, followed by its total resulting amount. The Total Deposit totalizes those three types (Sales - Refunds - Voids).

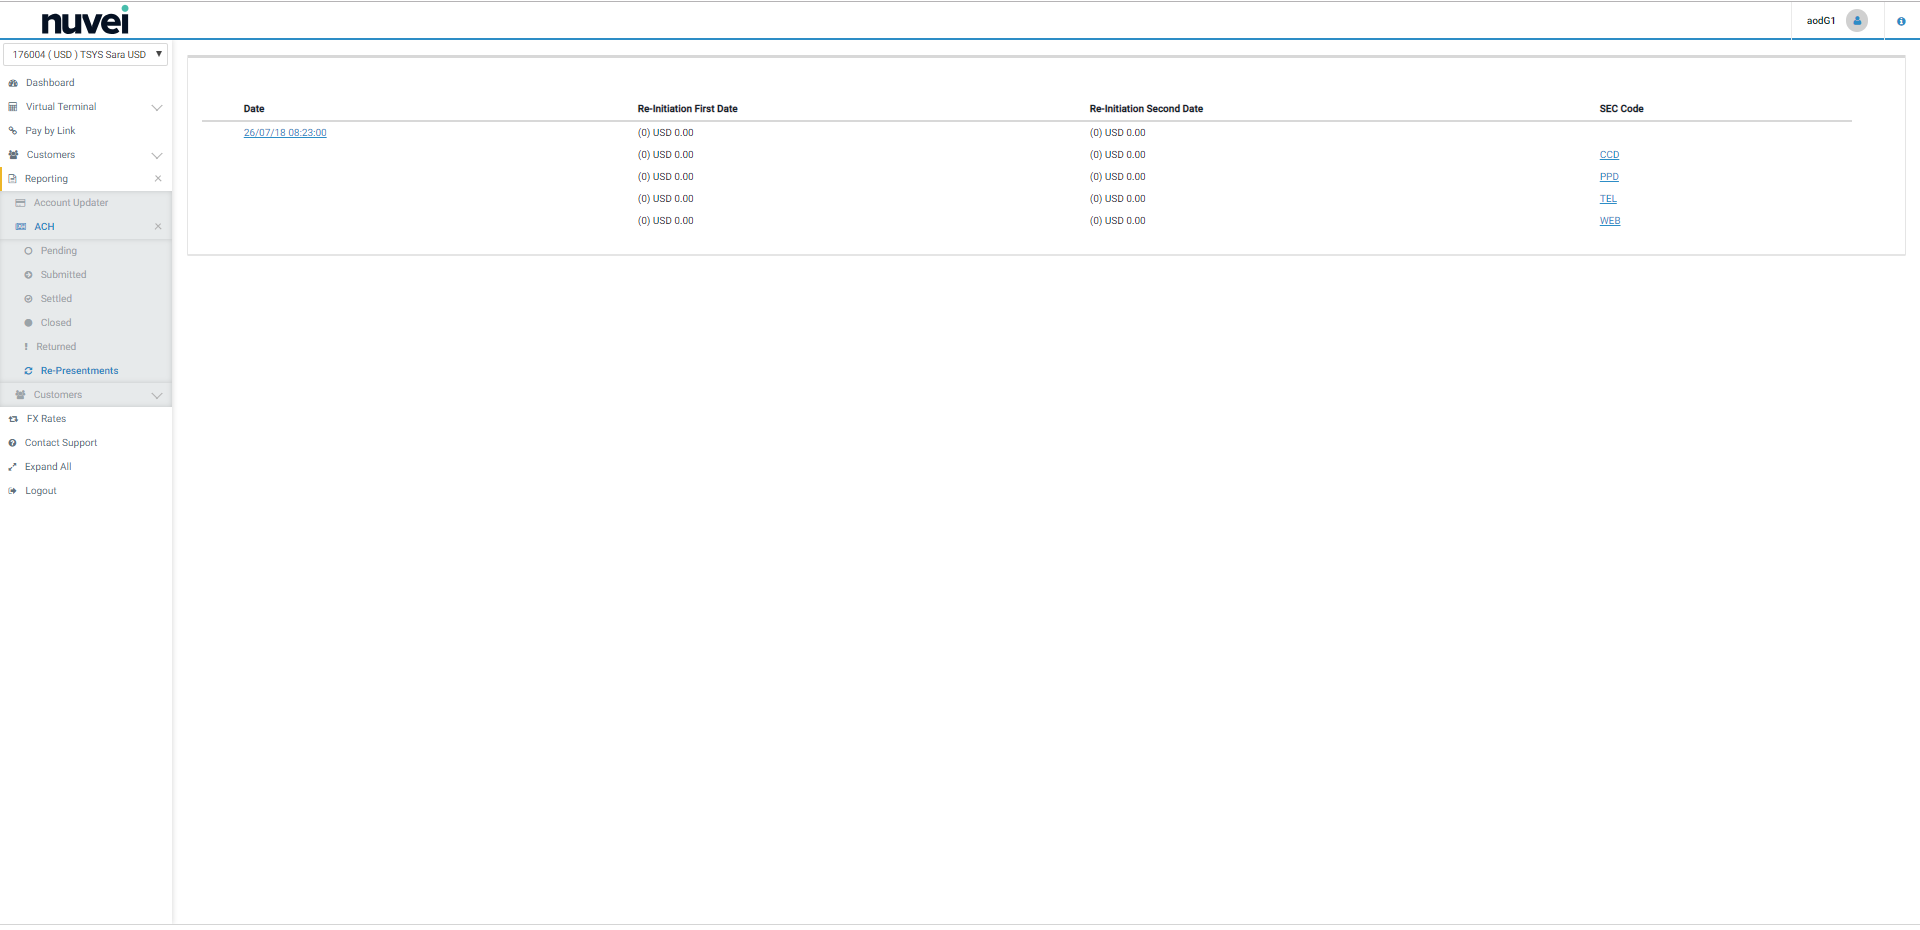
Transactions' Re-presentations
This report presents all the ACH re-presentrations of returned transactions for the used terminal:
- I. Grouped by Date.
- II. With a link (click on the date) to show the detailed list of transactions on that date.
- III. Detailed in five summarizing lines for the transactions performed on that date:
- a) The first top line (aligned with the date) represents the sum of the remaining 4 lines (that's why its SEC Code column is always empty).
- b) Each of the four remaining lines represents the total volumes for transactions of each one of the Sec Codes - CCD, PPD, TEL and WEB (refer API Specification - ACH JH to know a little bit more about SEC Codes). Additionally, a link is also provided for each SEC Code to the list of transactions with that code on that date.
- c) Additionally, each line also groups the transactions as Re-initiation First Date and Re-initiation Second Date by quantity, represented by the value between “()”, followed by its total resulting amount.
Customers
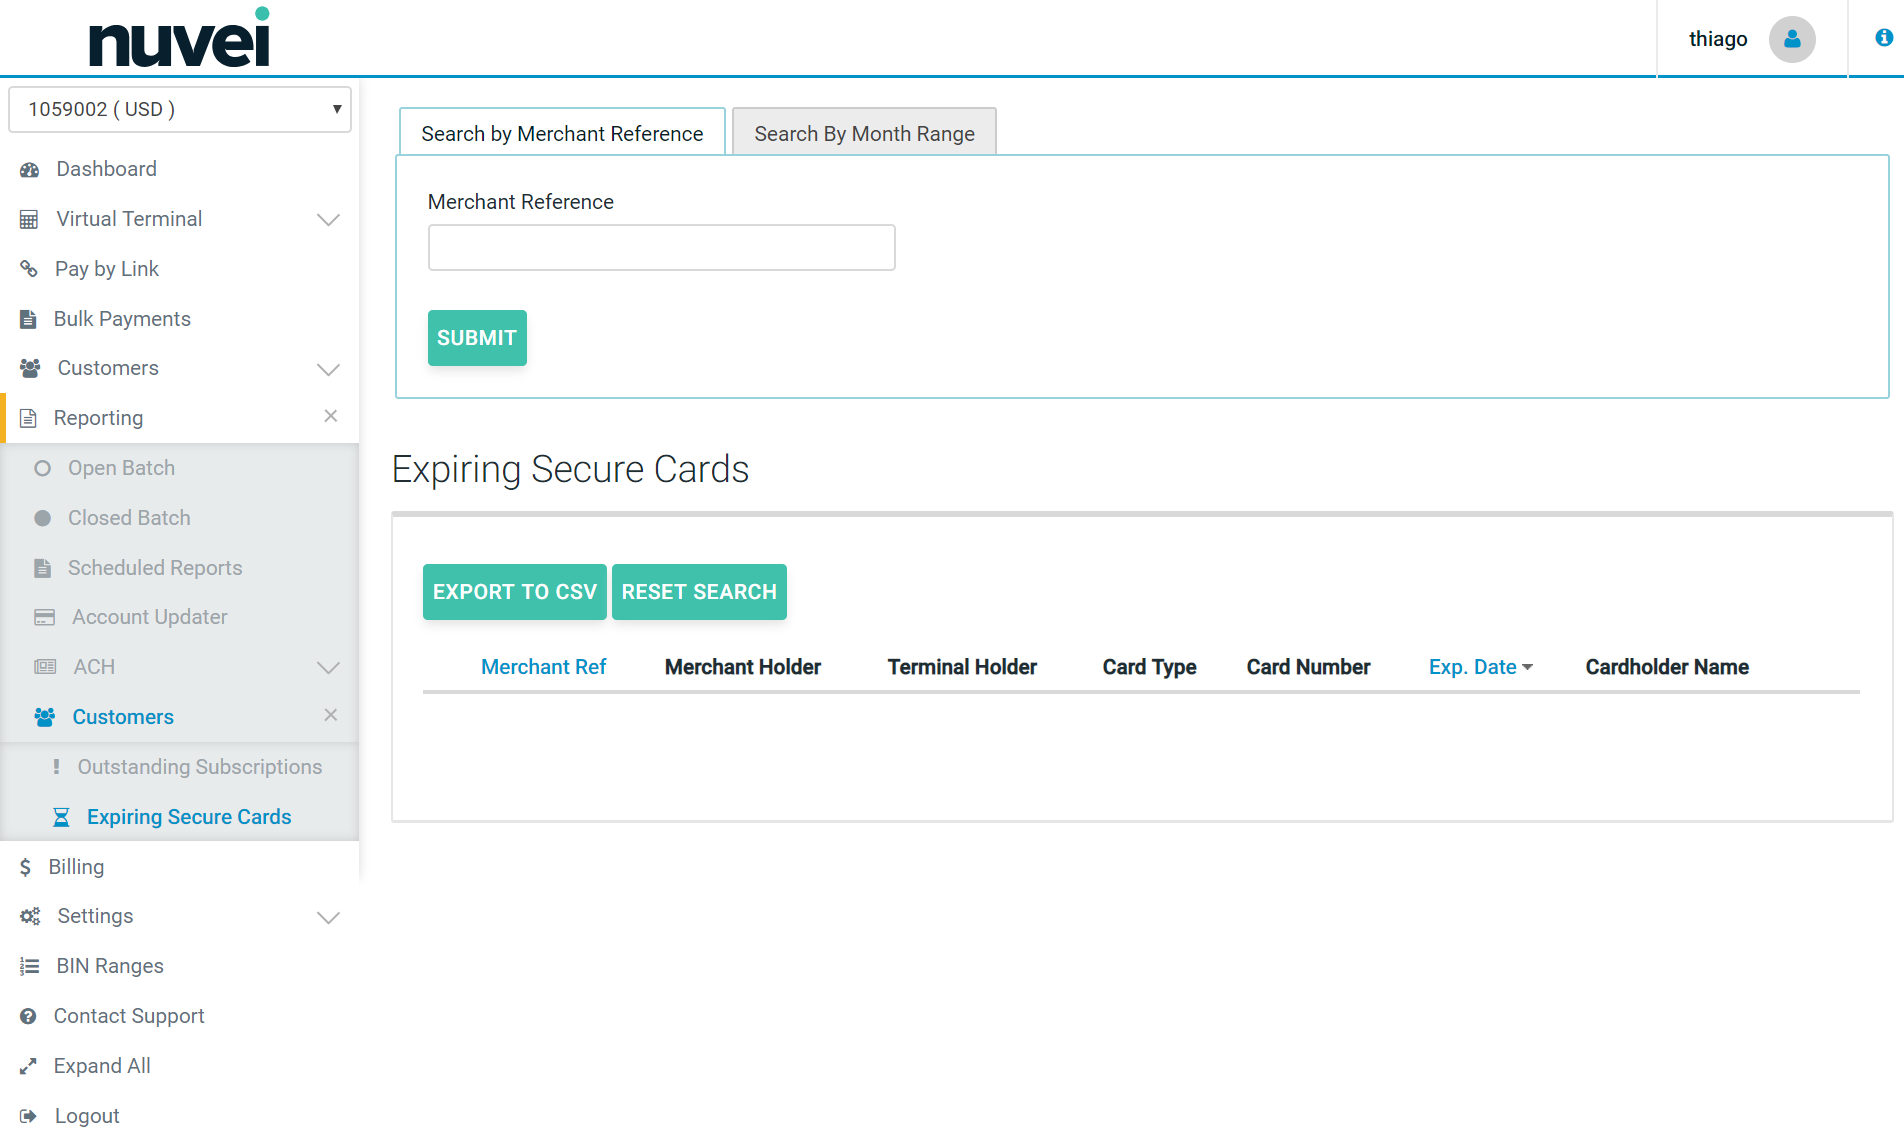
The “Customers” section under the Reporting tab enables merchants to view and manage “Outstanding Subscriptions with Payment Due” and “Expiring Secure Tokens”.
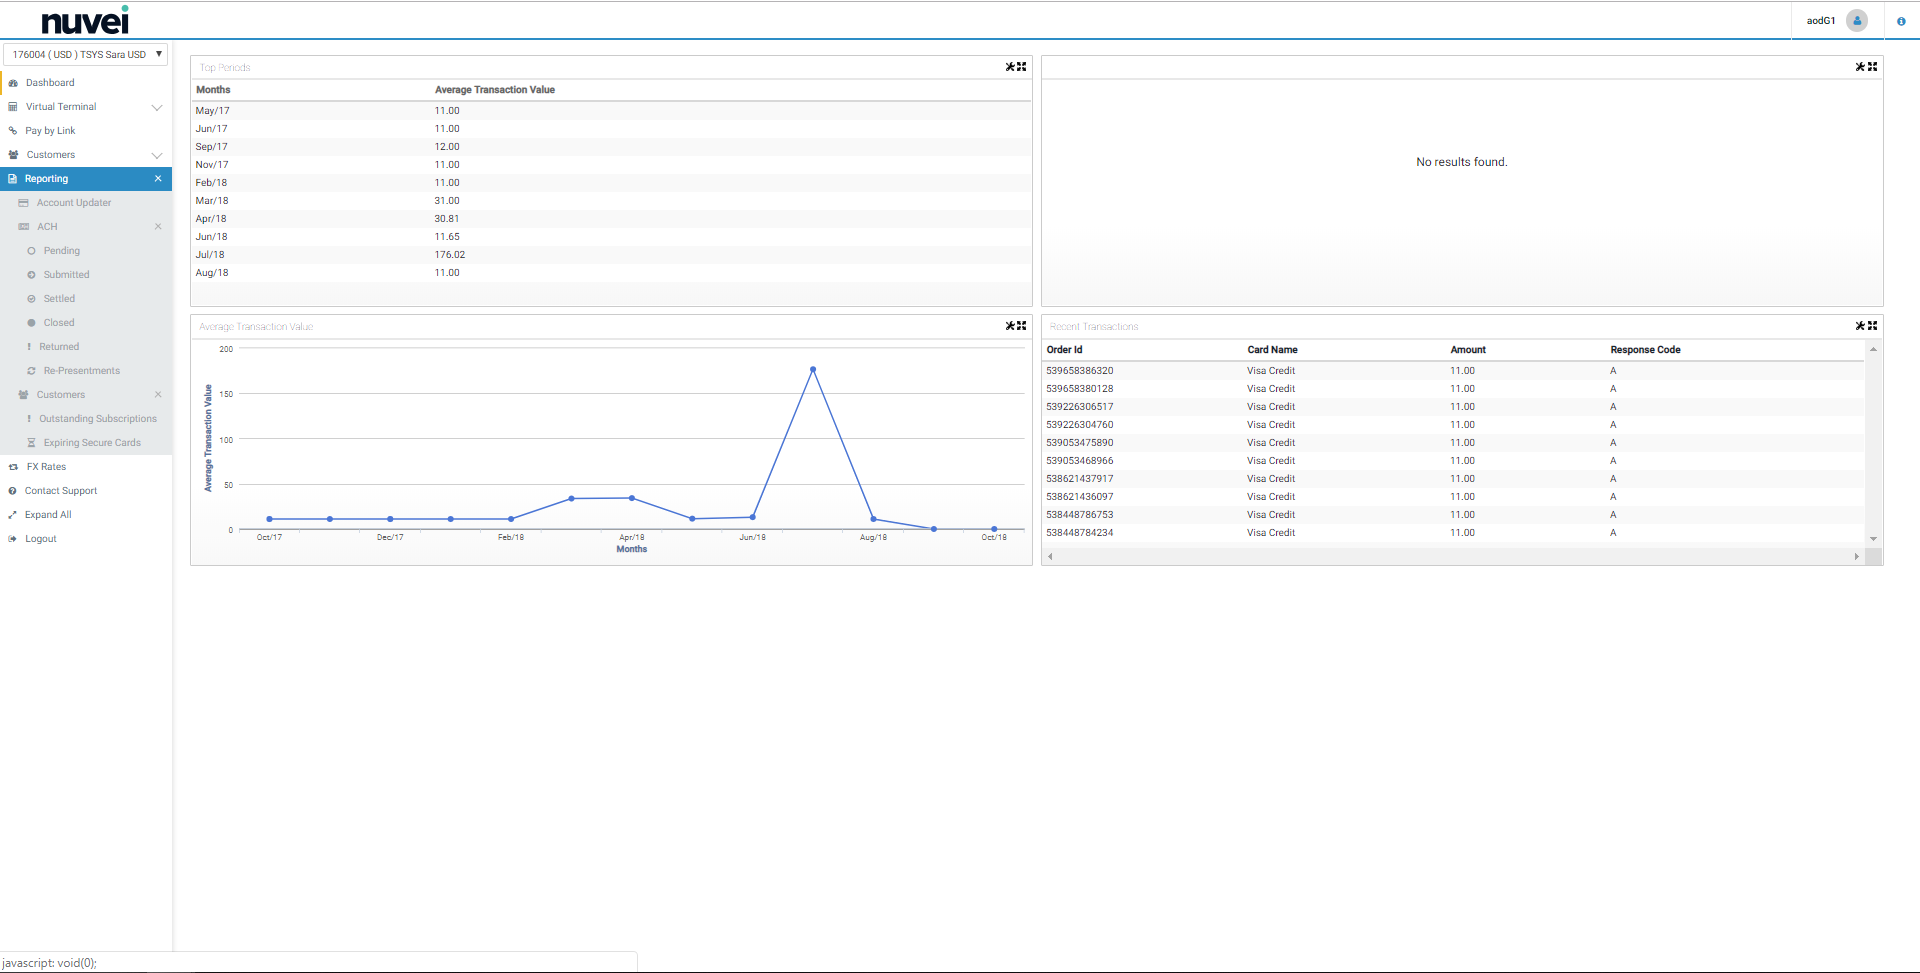
The “Subscription” option shows all the details related to outstanding subscriptions.
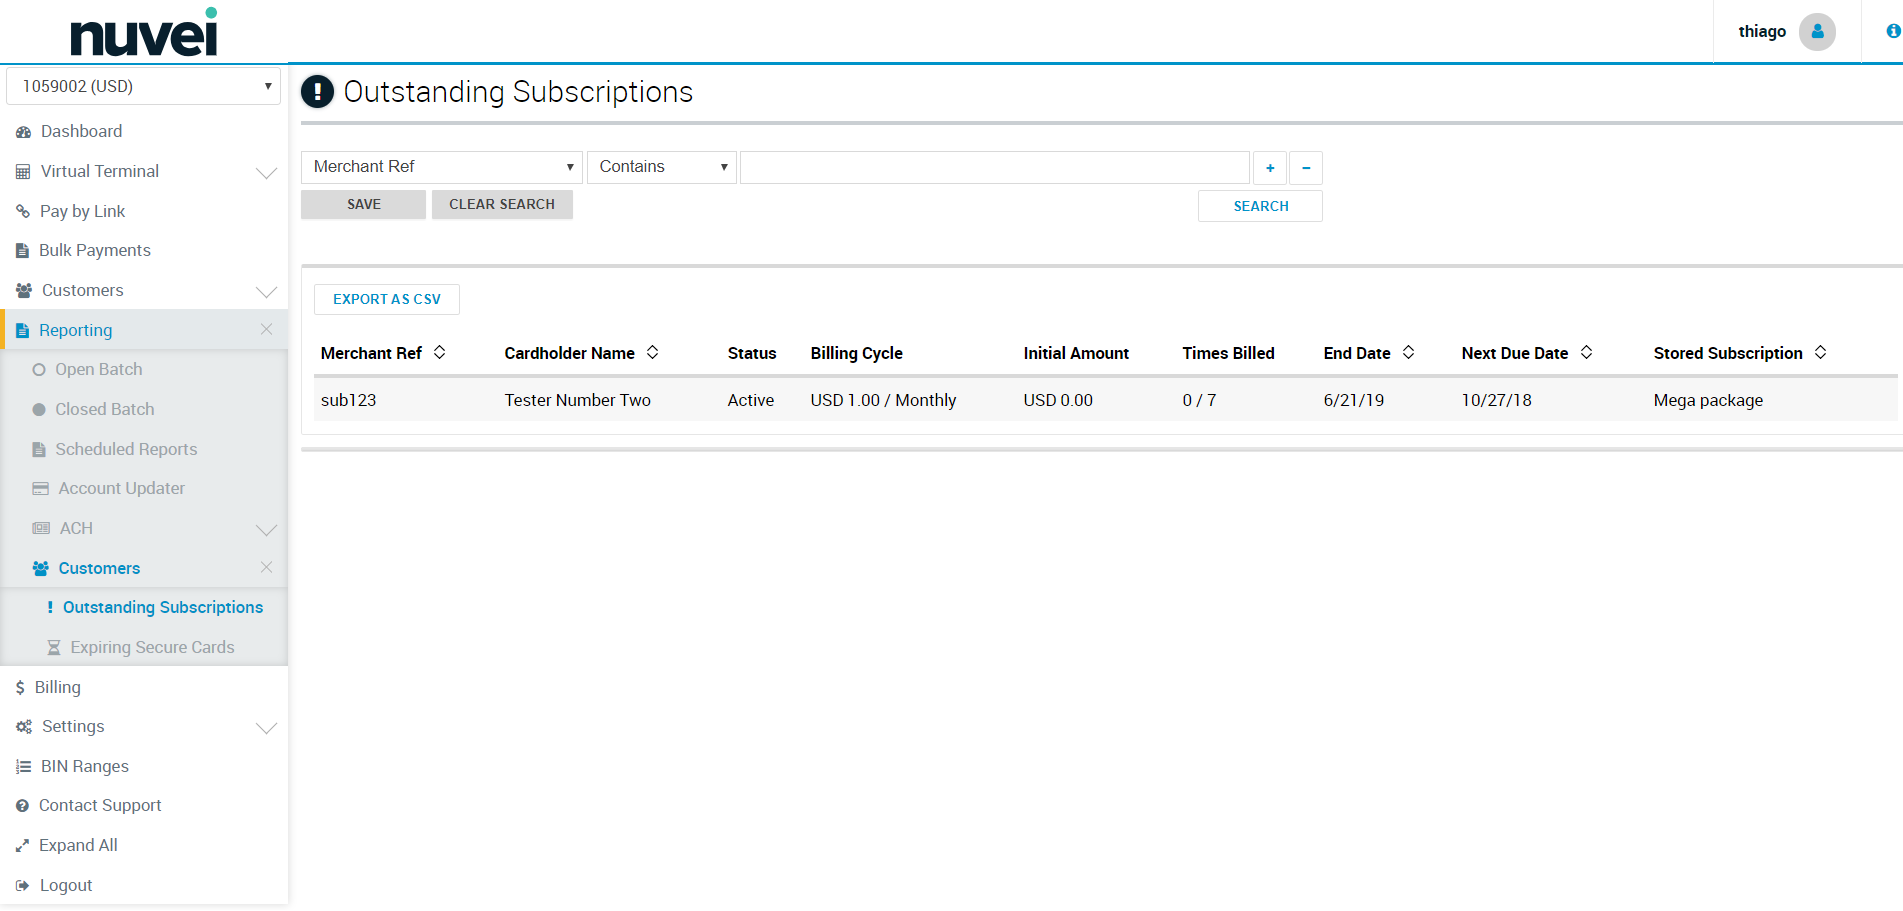
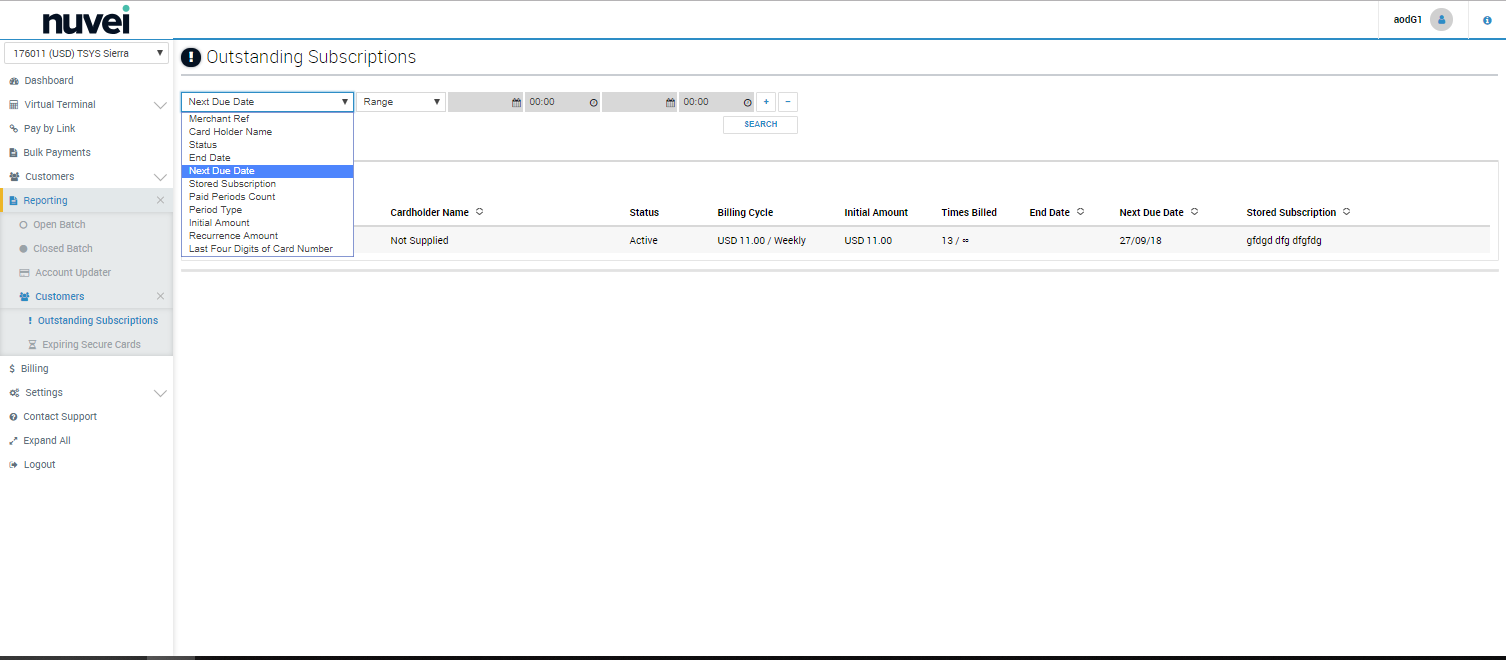
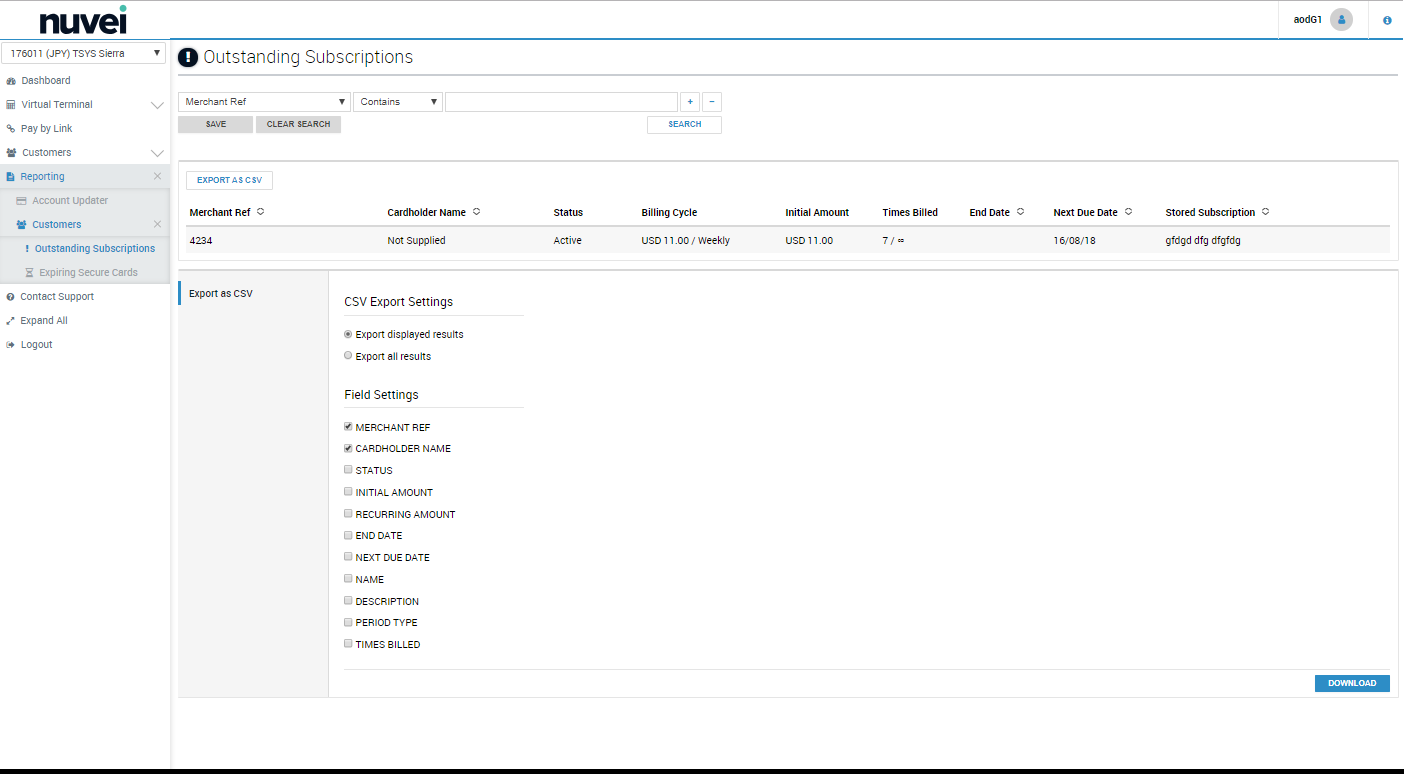
It also provides the option to filter and search those subcriptions and export the details on this report to CSV.
The “Expiring Secure Tokens” shows only the secure token which are going to expire within the 2 months. This section includes the following details: Card type, Merchant Ref, Card Number, Cardholder Name and Expiry Date. You can search for expiring secure tokens by “Merchant Reference” or by “Month Range” for up to 12 months.
It is possible also to export the details to CSV, if needed.